Dragon's Breath Table Build
Summary
TLDRIn this creative woodworking project, Cam collaborates with Chris from Force Furniture to design a unique table template without straight lines, pushing his design boundaries. Using a $3,000 slab of mappa burl, Cam experiments with coloring techniques, including bleaching and dyeing, to achieve a vibrant 'Dragon's Breath' effect. Despite the wood's softness and challenges in the staining process, Cam meticulously sands, fills, and applies a clear epoxy coat to enhance durability. The result is a one-of-a-kind desk that Cam plans to give away, showcasing his dedication to innovation and craftsmanship in design.
Takeaways
- 🎨 Cam, the creator, admits he's not skilled at drawing freehand and usually relies on tools for straight lines.
- 🤝 Cam collaborated with Chris from Force Furniture to design a unique piece of furniture, showcasing the importance of teamwork in design.
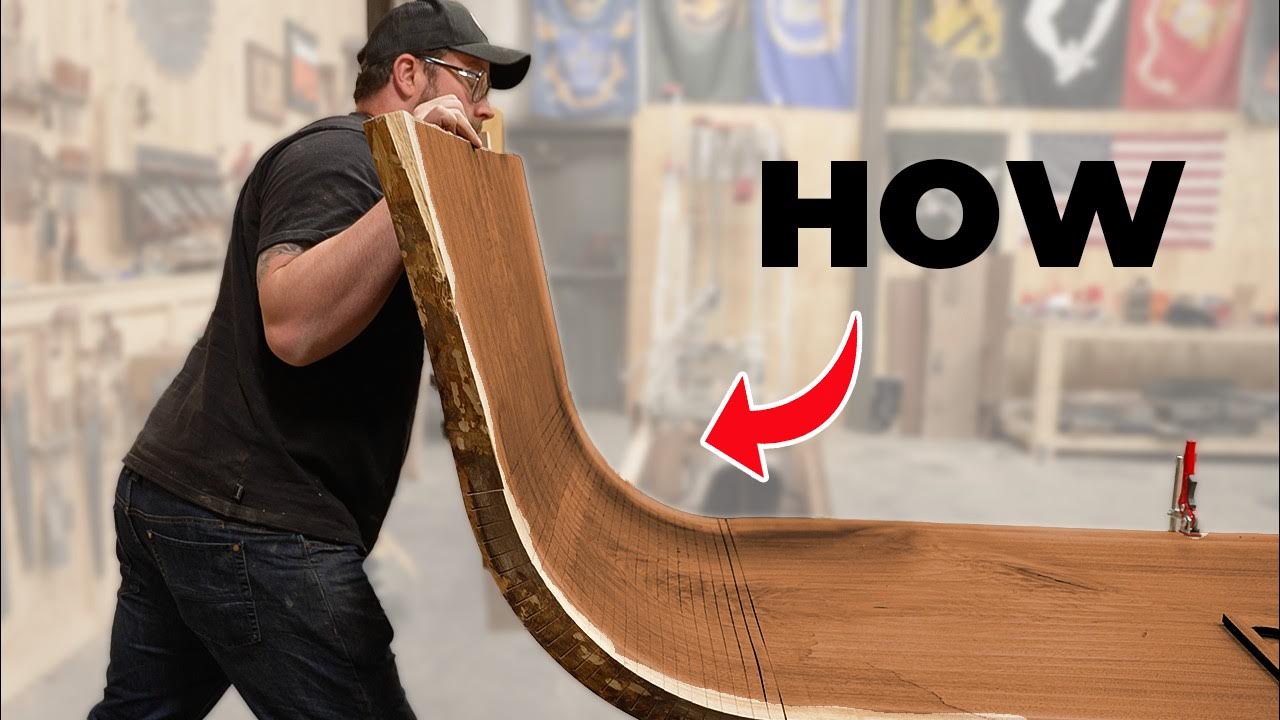
- 📐 The design process involved creating a template with MDF before transferring it to a more expensive and delicate wood slab.
- 🌳 A $3,000 slab of maple burl was used, which had some soft, rotted areas that required special attention to prevent staining issues.
- 🎨 Cam experimented with wood dye to address the soft and rotted parts of the wood slab, aiming to ensure even color absorption.
- 💡 He was inspired by a designer named Paul and used a list generated by an AI (chat GTP) to guide his design process, emphasizing innovation and collaboration.
- 🎲 The project involved a large giveaway, including the finished desk and other items, with the goal of engaging the audience and offering value.
- 🛠️ Cam used a variety of techniques and materials, such as fiberglass rods, epoxy, and wax fill sticks, to shape and repair the furniture piece.
- 🎨 A bleaching process was used on the wood to remove the brown tones before applying color, representing a step of innovation and risk-taking.
- 🔨 The final product was a vibrantly colored desk, heavily inspired by the guitar industry, with a focus on design elements like body relief and color gradients.
- 🏆 Cam expressed a high level of satisfaction with the final piece, indicating that it could be something he would personally want in his home.
Q & A
What was Cam's initial approach to designing the table?
-Cam's initial approach was to step out of his comfort zone and try to draw a design without using a ruler or straight lines. However, he found that his sketches were not satisfactory, leading him to collaborate with Chris from Force Furniture for a better design.
Why did Cam decide to use a template made of 1/4 inch MDF instead of directly building the table?
-Cam decided to use a 1/4 inch MDF template to allow himself more time to shape it closely to Chris's design. This would ensure that when he copies the shape onto the wood slab, it will be as close to the original design as possible.
What material is the wood slab that Cam plans to use for the table?
-The wood slab Cam plans to use is a $3,000 slab of mappa burl, which is a type of poplar tree wood salvaged by a local company called Hamilton Le Supply.
What was the issue with the mappa burl slab that Cam had to address?
-The issue with the mappa burl slab was that there was a lighter area which was rotted and very soft. This concerned Cam as he wanted to add color to the wood without it soaking up like a gran cracker.
How did Cam address the soft and rotted part of the mappa burl slab?
-Cam addressed the soft and rotted part of the mappa burl slab by applying epoxy, which would provide a solid base for the clear coat and protect the softwood from denting or breaking.
What is the purpose of the giveaway that Cam is organizing?
-The purpose of the giveaway is to give away the desk that Cam built, and it is completely free to enter, with free shipping for the winner. Cam wants to ensure that his audience is aware that he will never ask for money for such giveaways.
What inspired Cam to add a body relief to the design of the table?
-Cam was inspired to add a body relief to the table design because the long sweep of the table reminded him of the side of a Fender guitar, which has a body relief carved into it.
What was the process Cam used to fill the holes and imperfections in the mappa burl slab?
-Cam used a combination of glue sticks, wax fill sticks, and a torch to fill the holes and imperfections. He would heat the wax fill sticks with a torch and then fill the holes, and then sand the surface smooth.
What was Cam's strategy for coloring the mappa burl slab?
-Cam's strategy involved bleaching the wood to remove the brown tone, creating miniature samples to test different color combinations, and then applying a series of dyes to achieve a gradient effect from dark red to orange to yellow.
What was the final finish applied to the table, and why was it chosen?
-The final finish applied to the table was a 2K acrylic finish. It was chosen because it's a two-part finish similar to epoxy, which cures much faster, and it dries to the touch in about 15 minutes, which is ideal for Cam's spraying conditions.
What was Cam's opinion of the final outcome of the table project?
-Cam was very pleased with the final outcome of the table project. He stated that he 'freaking loved' the piece and would actually consider putting it in his own house, which was a surprise to him given his initial doubts.
Outlines
🤔 Struggling with Design and Collaboration
The speaker, Cam, admits to being incapable of drawing without a ruler and usually struggles with design. To overcome this, Cam steps out of the comfort zone and collaborates with Chris from Force Furniture to create a unique design for a table. They decide to build a template using 3/4 inch thick MDF to replicate Chris's design accurately on a wood slab later. Cam also discusses the challenges of working with a particular piece of wood, a $3,000 slab of maple burl, which has some soft and rotted areas that might affect the staining process.
🎨 The Purpose and Giveaway of the Design
Cam emphasizes the functional purpose of the design, which is to create a desk. Moreover, the desk will serve a greater purpose as it will be given away for free, including shipping, in a giveaway that is described as the biggest one Cam has ever done. Cam also warns against scams in the comments and mentions a link in the description for more details about the giveaway. There's also a humorous mention of craftsmanship and a playful jab at a previous video's board cutting mistake.
🛠️ Crafting the Design with Wood and Epoxy
The process of crafting the desk involves using epoxy to fill cracks in the wood and tinting it with charcoal to achieve a black color without staining the soft wood. Cam decides to use a wide belt sander for a flat and even surface. The design is inspired by the guitar industry, particularly the body relief on Fender guitars. Cam experiments with different colors and techniques to achieve a unique look, despite some initial doubts and the complexity of working with a soft and porous wood.
🔨 The Challenges and Innovations in Woodworking
Cam discusses the challenges of working with the soft and porous wood, including the risk of staining issues and the difficulty of removing color if applied incorrectly. The video shows a step-by-step process of staining, including bleaching the wood to remove the brown tone and experimenting with different dyes to achieve the desired effect. There's also a focus on innovation, as Cam tries a new approach to coloring wood that even a guitar maker advised against.
🎨 Finalizing the Color and Preparing for the Top Coat
After several iterations and adjustments, Cam finalizes the color of the desk, using a combination of orange and red over a bleached wood surface. The process involves sanding, feathering in colors, and carefully controlling the application to avoid a muddy look. Cam shows a moment of doubt but remains confident in the ability to make the project work despite the challenges. The video also includes a light-hearted moment discussing the timing of subscribing to the channel.
🏆 Completing the Project and Reflecting on the Outcome
The final stages of the project involve applying a 2K acrylic top coat, which is a two-part finish that cures fast. Cam uses a food scale for precise measurements and adds a splash of water for a smoother application. A protective layer of N3 Nano is applied to safeguard the table from potential damage. The desk is then attached to a flexi spot table base, with a discussion about the suitability of different bases for various needs. Cam concludes by expressing a surprising personal admiration for the finished piece and invites viewers to share their thoughts on whether they would include such a piece in their homes.
Mindmap
Keywords
💡Design
💡MDF (Medium Density Fiberboard)
💡Maple Burl
💡Craftsmanship
💡Collaboration
💡Innovation
💡Epoxy
💡Finishing
💡Giveaway
💡Flexispot
Highlights
Cam, the creator, admits to being incapable of drawing freehand shapes without a ruler.
Cam stepped out of his comfort zone to create a unique design with no straight lines.
Chris from Force Furniture collaborated on the design, providing a template for Cam to follow.
A $3,000 slab of maple burl, salvaged by Hamilton Le Supply, was chosen for its uniqueness.
A section of the wood was rotted and soft, posing a challenge for dye absorption.
Cam experimented with dye on the softwood to ensure it wouldn't absorb too much.
Inspiration for design improvement came from studying various design pages on social media.
A humorous interaction with a chatbot named 'Paul' provided a list of elements for creating great design.
The importance of collaboration in design was emphasized through the joint effort with Chris.
The desk's purpose is to serve as a functional piece of furniture and as a giveaway prize.
A giveaway will include the desk and five tabletops from a previous project, with free access to an epoxy table guidebook for all entrants.
Cam used a faster curing epoxy to fill cracks, tinted with charcoal to match the wood color.
A body relief inspired by Fender guitars was incorporated into the design of the desk.
The process of wood bleaching was experimented with to achieve a lighter base for coloring.
A meticulous process of coloring the wood involved multiple layers and sanding to create a gradient effect.
The final piece was sealed with a 2K acrylic finish for protection and durability.
Cam expressed genuine satisfaction with the final outcome, considering it a personal favorite.
Transcripts
sometimes you just can't improve on what
nature did perfectly however sometimes
you can although sometimes you can try
and make it much worse that is more
yellow than I was
expecting my name's Cam and I can't draw
if it doesn't involve a ruler it is a
shape that I am incapable of creating
but for this build I wanted a really
unique design so I decided to get out of
my comfort zone and try to draw
something without a straight line line
so made a handful of sketches and I
really did my best to convince myself
that these were just a little Avant
guard but after looking at them for long
enough I realized that a Jackson poock
painting would probably make a better
jumping off point for a piece of
furniture so I reached out to a friend
of mine that does not need a ruler to
make a cool design he can do anything
including straight lines although he
does have a hard time cutting straight
lines if you saw his last
video turn it off sorry if that's too
soon Chris but I asked Chris from Force
Furniture if he could help me create a
design and he came up with this and I
think this is a fantastic design now I
just have to figure out how to cut it
out and make it look exactly like the
way he designed it which wasn't too hard
but it was a little bit tricky without
using a
CNC I probably should clarify that I'm
not actually building the table out of
this/ Quin thick MDF what I'm building
here is a template and building a
template is going to enable me to take a
little bit more time shaping it to
hopefully as close to Chris's drawing as
possible and then I'll copy that shape
directly on onto the wood slab and it'll
be hopefully a perfect copy most of it
was pretty straightforward Chris gave me
a drawing with a bunch of different
angles and distances that I was able to
refer to the big sweep there I made with
those fiberglass rods that are actually
called fish sticks cuz they're used for
fishing electrical wires these Corners I
had to play around a little bit with
some coffee mugs and just different
shapes to get as close to the drawing as
possible and I just kind of smoothed
everything out with a hand sander and
was actually surprised at how well all
this went because i' never done anything
like this before
as exciting as Quin MDF is I think
you'll like the slab of wood that I'm
going to use even more this particular
slab of wood is a $3,000 slab of mapa
Burl which yes it's different than maple
Burl this is actually a type of popper
tree and this one was salvaged by a
local company called Hamilton Le Supply
and I had two slabs from the same tree
there was one problem here is this whole
area that's a little bit lighter was
basically rotted they said that it sat
out in the rain a little bit too long so
this is really really soft the wood in
general is incredibly soft but this part
was really concerning and since I wanted
to try to add color to it I wanted to
make sure that this doesn't just soak it
up like a gram cracker and so I pulled
some dye out just a random color and I
saw it it wasn't terrible it wasn't
ideal but I think it's going to be
workable I have always struggled with
design and I'm not just figting humility
here I genuinely believe I'm pretty
terrible at it but I also don't believe
that it's impossible for me to get
better so I work at it I study it I look
for inspiration elsewhere follow a ton
of different design pages on social
media and I recently came upon this guy
who is immensely talented and tragically
named we'll just call him Paul but Paul
had some of the coolest most original
designs that I've ever seen and I really
want to know how does a guy like Paul
come up with this inspiration what does
great design take and I didn't think
he'd respond to me on social media so I
did was kind of as a joke I asked chat
GTP I was like Hey respond as if you're
Paul and tell me the elements that it
takes to create great design and not
really expecting much and they came up
with this list and I read through I'm
like that's actually a pretty great list
so I am going to do my best to use this
list in this project and future projects
to help me create better
designs now I have to say that my
favorite point on that list is the
collaboration bullet point because
initially I thought that using Chris for
the design was kind of cheating but
apparently I am just a great designer
because we did collaborate on it we sat
down on a video call he gave me a bunch
of shapes we kind of moved the lines
around I'd say wider shorter longer
smoother things like that and eventually
the two of us collaboratively came up
with this design together as great
designers do I just wish I knew about
this when I was in school because I
can't tell you how many times I
collaborated on a final exam wasn't
always consensual but I could have just
told the teacher that I am just taking
design inspiration it's not actually
cheating it's like the moth in
uh uh sounds to the lamps you don't get
the reference some some of the viewers
[Music]
will Scott never understands my movie
references because he hasn't seen any
movies so hopefully one of you out there
actually appreciates it and anyway the
first point on that what makes great
design list was purpose does your design
actually serve a function and I'm
thrilled to say this does have a purpose
first off it's going to become a desk
but I think it has an even greater
purpose than that because it's going to
become a desk that belongs to one of you
guys out there because I'm giving it
away in the end and everything about
this giveaway is free it's free to enter
shipping will be free everything is free
so don't let anybody scam you in the
comments saying that you've won
something and all you have to do is pay
for shipping because that happens all
the time and it's really really sad
actually so if you see it happening feel
free to help people out because I will
never ask for any money from anybody for
one of these giveaways also this is
going to be the biggest giveaway I've
ever done there's a ton of other stuff I
don't want to spoil all the details now
but there is a link in the description
if you want all those details on this
giveaway it's
close fortunately for me that list on
great design did not say anything about
craftsmanship so you can safely
disregard the fact that that board was
cut 6 in is short and all of the
excessive use of caulk because I am
still in design mode here I haven't
quite switched gears into Craftsman mode
but to fill this crack I'm using kind of
a faster curing epoxy than the Deep
epoxy this stuff cures in about a day
and to get that black color I tinted it
with charcoal which is actually really
great because it doesn't dissolve in the
epoxy and it won't soak into the wood
and this wood is not only very light but
it's also incredibly soft which is the
absolute worst combination when it comes
to potentially staining the wood so in
the end though I think this charcoal and
the faster curing epoxy did a really
good job at preventing any of that color
bleed initially I was tempted just to
sand and scrape this epoxy level but
because the epoxy is so hard and this
wood is so soft I decided it was going
to be worth it head up to creative
woodworking use their big wide belt
sander which will ensure the epoxy the
wood everything stays absolutely flat
and will give a much better result
because I don't care how careful I am if
I tried to do this by hand I would
always get kind of a humped area where
that is and the wood would get kind of
eaten away a little bit faster so I
think it was worth the
trip if you haven't gathered already
this table is going to be pretty heavily
inspired from the guitar industry and
this next bit that I'm going to attempt
to incorporate was not part of the
original design but the more I got
looking at this big long sweep it really
reminded me of the side of a Fender
guitar and I don't know if you're a
guitar person or not but on the back of
the guitar there's like a little body
relief that's carved in that thought
could be actually really cool on on a
desk I've never seen it done before
quite like this and might actually serve
a slight function as well which I
believe is on my checklist of things
that make great design so this is how I
came up with the way to cut this relief
I just made a bunch of measurements
going down an eighth of an inch or I
think a 16th of an inch at a time now
I'm just going to kind of loosely
connect them with this Precision ruler
that I found in my kindling
bin if someone doesn't care for a piece
of furniture that I make there's
essentially an unlimited number of ways
that they can express their feelings
about that particular piece and
sometimes I'm a little impressed or at
least slightly amused with what people
come up with and the flip side of that
though is if somebody does like a piece
that I make there's really only a few
versions of compliments that I can get
first one is that's lovely I'd love
something like that in my home and I
would say that something like a walnut
table would fall into this Camp the flip
side to that one is oh that's really
cool I've never seen anything like it
but I definitely wouldn't put that in my
house and this is where I would say
something like that blue end table I
built a few months back would fall into
that camp and the next one I don't know
that is actually a compliment but it's
kind of an overlap with the first one
and it's something to the effect of yeah
that was cool the first 20 times I saw
it and I get it it'd be something like
the black epoxy and walnut table like I
built you know 40 or 50 times already
the Holy Grail though the one we're
always striving for is the oh my god
I've never seen anything like that and I
would love that in my house which I
don't know that I've ever actually made
anything that would fall into this camp
but that's what we're always striving
for and honestly if I look at this piece
and what I'm envisioning it's probably
going to be in that second camp where
yeah that's cool but I probably wouldn't
want it in my
house the router bit that I'm going to
be using on the bottom of the table is
the largest roundover bit that I own
this is a 7/8 in bit it's a pretty big
one and if you want to know what that is
in metric I don't know what it is in
metric you probably have to look it up
it's probably something impossibly
simple like two or something easy like
that because everything in metric just
has to be easier but in America we like
to prove to our grade schoolers that the
math they're learning now they will need
for the rest of their lives and kind of
surprised that American keyboards don't
come in cursive on that note but I guess
that's the price we pay for indoor air
conditioning being the
[Applause]
standard after editing my last video
Scott came to me with an interesting
question he said how many total audio
takes do you think that it took you to
complete the voiceover for that last
video and I know that it's a lot of
takes a lot of people out there think
that I'm better at this voiceover than I
am but trust me it's a lot of work so I
said I don't know 300 takes and he said
750 total takes and that did not
surprise me at all and you're hearing
that right which meant I had to stand at
a desk for about 10 hours just to do the
voiceover and took about 750 individual
takes to get a complete voiceover for
one of my videos which makes for a very
long day and why I love having a sit
stand desk cuz I'll sit do a little
editing then I'll stand up for the
voiceover section and just back and
forth for that entire 10 hours and if
you're curious the last sponsored video
I did was almost two years ago and it
was flexi spot because I don't take many
sponsors and if I do it has to be a
product I actually
use after I get as many of those cracks
and little Burl pits filled with the
glue sticks as I can I give it a light
sand and see what's left and what's left
is generally a lot more holes so this is
the next stage in filling those holes
these are little wax fill sticks which
are basically exactly like they sound
they're fill sticks made of wax kind of
like a crayon so I hit it with a torch
and these do a really good job at
filling the almost impossibly small
holes but again you need to make sure
you're using like a clear coat finish
over the top of this and you can see how
many of these holes I had left there but
I was determined to finish it with this
one fill
stick do you need another fill stick you
got some left here
it's getting a little stubby we we you
have other ones in the drawer I also
have this
one just don't want you to burn yourself
how would I burn
myself I'm thinking about it angle
away you got in my
head I was doing fine until you said
that
ow you sure you don't want to stop
it I'm so close to being
done see think I made a fill
sticks now I should elaborate on why the
giveaway I'm doing in this video is the
biggest giveaway I've ever done like I
mentioned I'm giving this desk away but
I'm also going to be giving away five of
the 10 tabletops from my last video my
last video I built 10 tabletops out of
denim and epoxy and I'm giving away five
of those also everybody who enters just
for entering will get instant access to
my epoxy table guide book something I
normally charge like 15 bucks for so
everybody that enters will get free
access to that again there's a link in
the
description this next process of
bleaching the wood prior to the color
has me pretty excited but also a little
nervous because the guitar maker that's
helped me out with coloring these woods
and the past specifically told me he
does not do this and he does not
recommend it however I'm going to go
against his advice and I'm going to try
it anyway I think this is on my
checklist of great design Innovation
right or that's what we'll call it but
here's my theory this wood has a really
Brown tone as you can see and in the
past I've had this problem when you add
color to Brown it just kind of turns a
muddy version of that color so my idea
is if I can strip that brown out of it
and then when I start layering and
adding those colors I will only get the
true true color n none of that kind of
Muddy brown but this is all kind of that
think about it logic that I've used in
the past and sometimes it works
sometimes it doesn't however what does
work is this wood bleach this is pretty
cool and way to see this side by side it
is shocking how much lighter and this
only took a few minutes for that to be
applied and then dry so now all I got to
do is make sure that this logic actually
applies and works when I add the color
[Music]
I still didn't know what color I was
going to apply or how that color would
actually look on a real mapa samples so
I built a bunch of miniature mappa table
samples and yes those are out of the
same wood and yes they are actually done
to scale from there I made a bunch of
different dieses out of trans tint
dieses and this is just regular old tap
water from there I did the first coat
kind of heavy I've learned that if you
do it heavy and then kind of sand it
back feather in the additional colors
you can get some cool effects but I
wasn't loving anything I'd come up with
so far and Scott was helping me through
this we were kind of choosing some
colors together but I don't think that
he was really loving anything I know I
wasn't it really wasn't the effect that
I was going for I would come back add
another layer and just kind of keep
Feathering these in there's a little bit
of purple and gold which turned out
pretty weird but eventually I came up
with
something all right after you left I
kept building the color we have kind of
a orange and black here built some
lacquer on it so we have a nice
Sheen uh want a little LSU theme I like
it uh I don't think you actually do I
think you're just being polite um
because I don't like it uh this is a lot
a little too similar to the end table we
did yeah so here's what we
got this is called Dragon's breath I
think is the term okay I like that I did
several different iterations like
wearing the bleach and all this but
they're all essentially dark red to red
to orange to yellow and so I think this
is uh I think this is our look what do
you think I think I agree I that look
sick way better right yeah a lot more
variation yeah and we don't want to be
associated with SEC purple's
a first time we've got SC to cut and I
agree the bleaching process did a pretty
aggressive job at raising the grain kind
of like when you get a piece of wood wet
and it turns fuzzy after it dries so I
had to do a pretty thorough sanding job
to make sure everything was nice and
smooth and as I got ready for the actual
die job I realized that Scott really
didn't trust my
process how confident are you that
yellow is the way to go are you asking
because you are not confident that
yellow is the way to go it it just
looked a little bright on some of our
samples it did look bright I think as
long as I don't go too heavy and we kind
of follow what we did with the samples I
think it's going to look really
nice that is more yellow than I was
expecting I can positively say that
there was some emotion being evoked when
I saw this yellow go on and I don't know
that it was good emotion but I do know
that emotion is on my checklist of
things that make great design so we can
check that one off of this build but
even though the yellow was the same
process I did on the samples I was kind
of second guessing it so on the top I
decided to do a different process and
what I'm doing here is I'm going to add
this orange and because it's been
bleached and hopefully it gets that
really true orange color I'm going to
sand most all of it off near the center
of it and all that's going to be left is
the orange in those deeper pits so in
theory I'll get kind of the pure yellow
and the pure orange with no none of that
muddy brown but again this is all kind
of that think about it
logic this whole dying process seemed
like it was two steps forward two steps
back sometimes two steps forward three
steps back because I liked the way that
yellow and orange looked then I added
this and it looked terrible again and I
don't think anybody could say it better
than Scott did here kind of looks like
you told a kindergarten to fingerpaint
the
[Music]
Sun that was pretty well said by Scott
but if I was a kindergartener who was
finger painting the sun I might be
offended now so direct any of that anger
towards Scott and normally when you're
dying a piece of wood especially a
harder wood like Maple if you don't like
the way it looks you can just keep
sanding till you remove the color the
problem is this one is so soft and so
porous I'm not so sure that I'll be able
to remove the color if I apply it wrong
so especially on those tips on those
kind of horn pieces that's where the
really rotted pieces still remained and
I was really nervous adding any color to
that section but I just kept going kept
trying to feather it in I added a little
bit of water here and I found that the
water really helped that transition
between the
colors based on all the guitars that
I've looked at and the samples that I
made I knew knew that I wanted a really
dark Edge I feel like the pieces that
had that almost black perimeter were the
most striking but again this is where
it's the most risky because if I put
this on too heavy or it doesn't look
good in general it may not sand out and
I know that generally my projects turn
out pretty well sometimes they don't but
for the most part it looks like I know
what I'm doing but I can assure you I
actually
don't people talk about in the comments
that this is like Bob Ross sometimes and
I think like oh wow you totally knew
what you were doing and you saved it as
I'm doing this now I don't know that I'm
going to save it like I think I will but
it's it also looks like to me and I get
nervous every time I do this how's it
look to you um very
bright
uh yeah okay fair enough all right back
to sanding we we we got this
as usual Scott silence spoke volumes but
it really just reaffirmed what I already
knew in that it didn't look good and
there's no guarantee I'm going to pull
this off at this rate and not trying to
be overly dramatic I generally feel like
if you keep pushing through a project
you'll find a way to make it work and I
still am confident I can find a way but
as I'm sanding it off and adding more
that red it just wasn't looking right so
I decided to try this this is just a
sanding block I think that power sander
was removing a little bit too much color
so using the hand sander is going to
enable me to really control how much of
it I'm removing and that way I can maybe
not take off all the red I'll just kind
of remove a bit of it help control that
gradient from the orange to the red and
this was actually Scott's idea here he
said that adding the red might have been
too much so we just added this orange
over the red and that's the same orange
you see below it but when it was layered
over that kind of half sanded red it was
starting to look really cool and this is
where I was thinking okay we can
actually pull this off this might
actually look good the last thing I
noticed didn't look quite right was that
straight strip there where we kind of
curve around the edges and so what I did
is I used the hand sander again to just
give kind of a radius to it so it goes
up to just a small tip there a small
point at the end and again hopefully if
I do this with enough control and enough
restraint don't say too aggressive it'll
look good again adding just orange here
so the orange over the dark red over the
red was really really starting to bring
this home and I think I just about had
it here
if you weren't aware of this already the
20 minute Mark of a video is generally
considered to be the kind of third dat
equivalent when it comes to whether or
not to escalate a relationship to the
next level so if you are considering
subscribing the 20 minute Mark or 21
minute Mark might be a good time however
if you're a little bit more oldfashioned
and you want to take a little bit slower
I want to make sure this is consensual I
don't want to pressure you into doing
anything you don't want to do so you
take as long as you need if you want to
subscribe if it's meant to happen it'll
happen but just know I'm here for you
and I am ready when you
are this is how I'm addressing the
really soft nature of this map of burl
you can see those tips there that's
where the rotted wood was and that is
absorbing even more of this epoxy so I'm
just kind of traveling it on letting it
absorb hitting it with the torch which
Heats it up thins it out and makes it
absorb even more epoxy and I just kept
doing this until it wouldn't absorb
anymore and even though this is going to
have a really hard clear C coat over the
top it's kind of like if you were to
clear coat a Saltine that Saltine would
have the hard clear coat but if you drop
something on it it would Dent or break
the saltine and the same thing would go
here if I put that clear coat on and you
drop something on it it would still Dent
that softwood underneath so this should
give a good solid base for that clear
coat in the
end I did two more coats of that epoxy
just to make sure that this squishy
mappa absorbed as much as it possibly
could I tried to tral off as much as I
could but there was still a few drips on
the edge these make me a little nervous
because you risk sanding through the
color if you get through that epoxy into
the color it's kind of hard to repair it
and really make it look natural so as
gently as I could I got it nice and
sanded to smooth as possible because I'm
going to be spraying a 2K acrylic and I
don't know a lot about spraying if
you've seen me spray in the past you
know I'm pretty terrible at it but like
everything I'm working on getting better
the 2K acrylic is cool because it's a
two-part finish kind of like an epoxy
where you add the activator and it cures
much faster and this is just the sanding
sealer but it's dry to the touch in like
15 minutes which is good because if you
look on the day I chose to spray there's
a lot of stuff blowing around so I can't
spare any excess time of this sitting
around being wet and again like I said
I'm not great at it but I'm working on
slowly getting
better I knew that I was going to have
some more holes to fill even before I
started spraying but I wanted to give
myself a little bit more of a safety net
so I added two coats of that sanding
sealer and now I can one really clearly
see all of those little pits that need
to be filled and two I have a slight
protective barrier between my scraper
and my sander and that color because
again if I go a little bit too
heavy-handed I can scratch right through
that color and I can't really repair it
so having the sanding sealer on there
should give me enough of a buffer to
protect me from totally ruining it at
this
stage I know I said earlier in the video
that the likely best case outcome for a
project like this is a project that
someone says oh yeah that's cool but I
never want that in my house and I'm as
critical as anybody when it comes to
actually putting something in my house
but I spent a lot of hours staring at
this cuz there was so many imperfections
that needed to be filled there were so
many coats that I did here that I
started to Wonder Could This actually be
something that at least I personally
might want in my house and I'm not there
yet but I was really really liking how
this was shaping
up I was finally to the top coat stage
past the sanding sealer and onto the
last coat and this is not a sponsored
product the one I'm using here is a 2K
acrylic by a company called rener I'll
link everything I use in the video in
the description but nothing sponsored
unless I say it's sponsored and this is
the activator that I put in I find that
a food scale does a really good job at
measuring everything out and a little
bit of water just a splash of water is
something I've been told makes a huge
difference but I don't recommend doing
it in an oilbased finish make sure
you're using a water-based finish if you
want to do that final thing that I do is
just a wipe down with a tack cloth my
friend showed me this that paints cars
makes a big difference and again don't
copy my style for applying the finish I
am still learning how to use this but I
found that having the thinned out water
version with this makes it go on a lot
thicker and a lot smoother really lays
flat and you can see it looks kind of
purple as it's going on and that's just
because it has kind of a blue tint until
it dries and it won't look like this in
the end don't
worry the last thing I did did before
attaching it to the table base is ensure
that whoever ends up winning this is set
up for Success so did a quick
application of N3 Nano just to make sure
it's safe from spills stains scratches
kids uncles in-laws out on parole
whatever it'll be
safe day flexi spot asked me to help
promote their most stable table base
that they have ever offered the E7 plus
it can lift over 400 lb and that was the
table base that was originally going to
go with this table top however once I
got it on there I realized that it was a
little too blocky and I reached out to
flexi spot and said hey can I put the
other table base on there the same one
that I have on my desk so they sent me
the modern version of that they said
yeah we have a table base for everybody
which is great so if you want super
heavyduty can't budget with a tank get
the E7 plus if you want something a
little bit sleeker like I have the E7
Pro or the E7 is a great choice all of
them come with a 15-year warranty you
can add all kinds of accessories like I
have on mine I have monitors I have
cameras I have lights and they are
offering a brand a sale at flexispot
there is a code Blacktail 50 if you want
$50 off your order of $500 or more head
to flexispot
outcom if you've seen my videos in the
past you know that I'm never shy about
giving my real opinion on a project I
build if I don't like the way it turned
out I'll just say I don't like the way
it turned out I never think that I'm
going to trick somebody into enjoying a
video more just by saying look how
amazing this looks if it doesn't
actually look amazing you guys have eyes
you can see the projects too that said I
freaking love this piece I didn't think
I would I would actually put this in my
house and I never thought I'd say that
when this project started but I don't
know if I'm alone there so let me know
would you actually put a piece like this
in your house too or is it just
me my name's Cam and I can't draw
i
i as
exciting luckily that list on luckily
that list luckily that Lu
fortunately that list on great design
didn't say anything about great
craftsmanship craftsmanship if you
haven't gathered already this sake if
you haven't gathered already this
sake
5.0 / 5 (0 votes)