Client Gave Me $16,000, Then Changed His Mind
Summary
TLDRThe video narrates the journey of crafting a custom ski-themed epoxy table, originally intended as a secondary piece to a large black walnut dining table. The creator details the challenges and intricacies of the project, including the customer's swift trust and payment, the technical difficulties of casting skis in epoxy, and the eventual decision to honor the original cost despite inflation and the creator's personal reservations about the project. The final product, a testament to craftsmanship and customer service, is delivered with a nod to the shared respect between creator and client.
Takeaways
- 🛠️ The story revolves around a $10,000 table project that the craftsman initially did not want to build for a customer who requested a unique coffee table made from skis cast in clear epoxy.
- 🏠 The customer initially ordered a 16ft long by 5ft wide single slab black walnut dining table for his new cabin in Colorado, with a lead time of 12 to 16 months.
- 💰 The customer paid a 50% deposit of $16,000 upfront without hesitation, showing trust and readiness to proceed with the project.
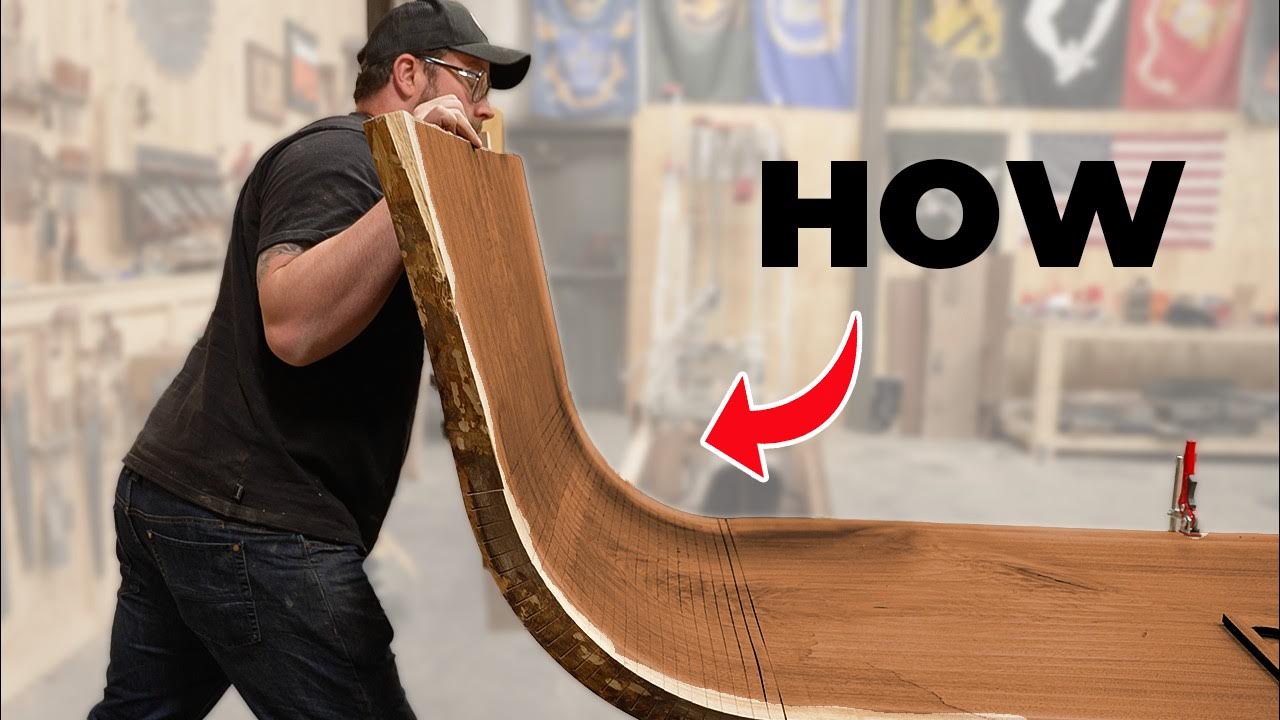
- 📏 The craftsman built a mold from melamine to cast the skis in the desired arrangement as per the customer's photo, ensuring accuracy and precision.
- 🎨 The table was given a slight blue hue in the epoxy to counteract the yellowing effect that occurs over time, maintaining the clarity and aesthetic appeal of the table.
- 💡 The craftsman used fans during the epoxy pour to prevent overheating and potential cracking, highlighting the importance of temperature control in the process.
- 🔨 The craftsman faced a dilemma when the customer decided to switch from the large walnut table to the ski table, as the original quote was significantly lower than what it would have been in the present market.
- 🔄 The craftsman decided to honor the original $10,000 cost for the ski table, despite inflation and the passage of time, as a gesture of goodwill and customer satisfaction.
- 🛠️ The table's construction involved several challenges, including the removal of trapped air bubbles in the skis and the decision to not use visible bolts for a cleaner look.
- 🖼️ The final product was a successful ski epoxy table with a frosted underside, which received positive feedback from the customer, and an additional protective coating of N3 Nano was applied for extra durability and scratch repairability.
Q & A
What was the original request from the customer for the table?
-The customer initially requested a single slab black walnut table that was 16 feet long by 5 feet wide.
How long did the woodworker estimate the lead time for the black walnut table?
-The woodworker estimated a lead time of 12 to 16 months for the black walnut table.
What was the initial cost quote for the black walnut table?
-The initial cost quote for the black walnut table was $32,000, excluding shipping.
How quickly did the customer agree to the quote and provide a deposit?
-The customer agreed to the quote and provided a 50% deposit of $16,000 within minutes of the initial conversation.
What material was used to create the mold for the ski table?
-Melamine was used to create the mold for the ski table.
Why did the woodworker decide to add a slight blue hue to the epoxy?
-The woodworker added a slight blue hue to the epoxy to offset any yellowing that might occur over time, helping the table maintain a clear appearance.
How did the woodworker ensure the skis were evenly placed within the epoxy?
-The woodworker traced the skis on the melamine mold and used half-inch blocks of plywood as stand-offs to ensure the skis were evenly placed and hovering within the epoxy.
What was the customer's reaction to the final cost of the ski table?
-The customer accepted the final cost of $10,000 for the ski table, even though the woodworker was not passionate about the project and would not have taken the order under different circumstances.
What issue arose with the construction adhesive used to attach the top of the table to the base?
-The construction adhesive did not dry to a clear and opaque look as expected, resulting in wavy lines on the surface that the woodworker found unsatisfactory.
How did the woodworker resolve the issue with the construction adhesive?
-The woodworker removed the adhesive with a chisel plane, sanded the area to recreate the frosted effect, and then added threaded inserts with epoxy to secure the table top to the base.
What product was applied to the table for added protection and repairability?
-N3 Nano was applied to the table, providing protection from spills and stains, and serving as a repair surface for any potential scratches.
Outlines
🛠️ The Unwanted $10,000 Table Project
The video begins with the creator discussing a challenging table project that they were not enthusiastic about. The customer requested a unique coffee table made from skis cast in clear epoxy, despite the creator's preference for a different type of project. The creator explains the customer's original request for a large black walnut dining table, the negotiation process, and the significant deposit paid upfront. The story then transitions to the actual construction of the epoxy table, detailing the process of building a mold, arranging the skis, and the decision to use a slight blue hue in the epoxy to counteract yellowing over time.
💸 Navigating the Complexities of Pricing and Customer Relations
In this section, the creator shares the complexities of pricing the epoxy table project. Despite the project not being their preferred type of work, they chose to quote a reasonable price to maintain a good relationship with the customer and ensure future business. The creator also discusses the technical aspects of working with epoxy, including the use of fans to prevent overheating and the decision to mix the epoxy in a careful manner to achieve a consistent color. The narrative then returns to the customer's shift in preference from the large walnut table to the ski table, and the creator's commitment to honoring the original quote despite the passage of time and potential inflation.
🌐 Balancing Aesthetics and Practicality in Epoxy Finishing
The creator delves into the finishing process of the epoxy table, discussing various methods they have used in the past and the decision to use a 2K acrylic coating for added durability. They explain the sanding and polishing process required to achieve a high-quality finish and the challenges of dealing with bubbles in the epoxy. The creator also talks about the failed attempt to create a frosted underside for the table and the eventual solution involving welding tabs onto the metal base. The paragraph concludes with the successful application of N3 Nano for added protection and the final assembly of the table.
📦 Delivering Satisfaction: The Completion and Reception of the Project
The final paragraph details the completion of the table and the creator's decision to hold off on delivery until the customer was ready to receive it. The creator reflects on the entire process, expressing mixed feelings about replicating the project but ultimately satisfaction with the outcome. The customer's positive reaction to the table is shared, along with the creator's request for the customer to leave a comment if they watch the video. The video ends with the creator's attempt to get a photo of the table in the customer's home, showcasing the final product in its intended space.
Mindmap
Keywords
💡Clar环氧树脂
💡黑胡桃木
💡铸模
💡色差
💡热处理
💡气泡
💡抛光
💡底面磨砂
💡装配
💡客户服务
Highlights
The story revolves around a $10,000 table project that the craftsman initially did not want to build.
The customer provided skis to be cast in clear epoxy for a unique coffee table design.
The original order was for a 16ft long by 5ft wide single slab black walnut dining table.
The craftsman gave a quote of $32,000 for the walnut table, excluding shipping costs.
The customer agreed immediately and sent a 50% deposit of $16,600, showcasing trust and readiness.
The craftsman built a mold out of melamine to arrange the skis as per the customer's preference.
A slight blue hue was added to the epoxy to counteract potential yellowing over time.
The craftsman faced challenges when mixing large quantities of epoxy with consistent color.
The original order for the walnut table was modified to include the ski epoxy table.
The craftsman did not want to overcharge the customer for the ski table due to inflation, honoring the original $10,000 quote.
The table base was modified to include bolts for stability, despite initial reservations.
The craftsman used a flush trim bit to ensure a perfect fit between the table top and the metal base.
The epoxy table was finished with a 2K acrylic for added durability and protection.
A frosted underside was created for the table to prevent transparency and add aesthetic appeal.
The final product was a solid epoxy ski table that the customer was thrilled with, despite the craftsman's initial reluctance.
The customer's house in Colorado faced construction delays, but the table was completed on time.
The craftsman held onto the finished table in his shop for six weeks until the customer was ready for it.
The customer's satisfaction with the final table is evident, and a photo was provided for the craftsman's records.
Transcripts
this is a story of a $10,000 table that
I did not want to build but my customer
never knew that and the only way he's
going to know that is if he watches this
video as you can probably guess what I
have here is a bunch of skis provided by
the customer that he's asked me to cast
in clar epoxy and turn into a coffee
table but that's not actually the table
he paid me for when this customer first
reached out over 3 years ago he said
he's in the process of building a new
cabin in Colorado and wanted a quote
really big dining table and I'm like all
right I like big dining tables what are
you thinking like 9 ft 10 ft maybe 12 ft
long and he's like yeah close what I
need is a single slab black walnut table
that's 16 ft long by 5T wide and I was
like okay yes that is a really big
dining table and he said the house is
still a little ways out but wanted to
get the ball rolling on the furnishings
and wanted to know what my lead time was
and I'm like oh for a table that size
probably 12 to 16 months or so he's like
yeah that should line up pretty well
with construction what's it going to
cost and I'm like okay off top my head
doing a little research I've seen slabs
that sized price before and they can be
as much as like 20 $22,000 I'm thinking
hopefully I can get one for 14 or
$15,000 so I told him $32,000 for the
base and everything except for shipping
and normally when I have these
conversations with clients they go on
over the course of days weeks sometimes
even months and he just says okay what
do you need from me and I was like well
I'd need a 50% deposit so $1,000 and he
goes great send the invoice over and I
keep in mind I literally just talked to
this guy for the first time maybe 15
minutes ago and I was like this guy for
real is he messing with me but I was
like okay so got his information sent
him a QuickBooks request for $166,000
thinking we'll see if he actually pays
this and in like a few seconds I get a
notification that the payment's been
received and I was like okay this guy is
really ready to rock and roll and he
told me wait for me don't buy the slab
yet I'm still planning the house we'll
let you know when it's time to start
working on the
table I will keep going with that story
but I realized there's probably a few
people here that want to know what's
actually happening in this build so all
I've done so far is I built a mold out
of melamine and then I put all the skis
in there the way the customer chose I
was holding that photo in my hand if you
noticed and that was the photo the
customer sent me showing me how he
wanted each of the skis arranged and so
what I did then traced everything with
the pencil so I knew I could come back
and get it exactly lined up in the
perfect spot and I thought it would look
a little bit awkward if I just put the
skis on the very bottom of the table
also thought it might be a little bad
when I run them through a planer cuz I
didn't want to actually Plane off part
of the skis so what I did was I have
these little half inch blocks of plywood
and those are going to be perfectly fine
going through the planer and they're
also going to give a nice little
standoff so all the skis will just be
essentially hovering
there if you've seen any of my past
epoxy table videos you know that I
almost always just work with black epoxy
and I wish I could tell you it's because
I'm an artist and I think that the black
looks the best and it's the classiest
and the most timeless and all that and I
do believe a lot of that to some degree
but it's also probably the most
forgiving so it's really nice working in
a Dusty environment because if you get a
little speck of dust in there you'll
never see it unlike this very very clear
table or I should say almost clear table
I'm actually putting a slight blue tint
in it and that's for a couple reasons
one I think it'll look a little bit
better but two any epoxy over the years
and I mean like 5 10 20 years will
develop an Amber Hue kind of a yellowing
but the blue if you get on the color
chart or the color wheel it's kind of
the opposite end of that yellow and it
will offset the yellowing so as it does
yellow it'll actually just look clear
it's kind of a cool effect and I have
some samples that I've tested this with
over the years so talked it over with
the customer and said hey I'd like to
give a really just gentle blue hue what
do you think and he said that he loved
it but the problem was going to be
mixing this much epoxy up and getting
that same blue hue which is why I'm
going bucket to bucket and I Tred to
keep the drops consistent but I always
got an extra drop in one bucket or one
less in the other bucket so got them all
mixed up and now I'm finally ready for
the
pour so why am I building a 5T long
solid brick of epoxy table when he paid
me for a 16t long solid Walnut table and
about a month or so after he gave me
that deposit he reached out and said hey
I'm thinking about adding another table
to the order what do you think about
this idea and he basically pitched me
the skis cast an epoxy table and what I
didn't tell him is I absolutely despise
making these types of tables they are so
much more difficult than say like an 8ft
Walnut and black epoxy dining table but
I don't want to tell him that when I
hire someone the last thing I want to
hear from them is how difficult the job
is because yeah that's why I'm hiring
you to do it because I don't want to do
it so I didn't tell them how difficult
it was but I also didn't want to really
gouge him on the price because I wanted
him to think he could come to me for all
of his future tables because I like
building big dining tables he's probably
going to need a coffee table he might
need countertops and I want him to be
able to come to me even though this
particular table isn't one that I really
want to build and so I gave him a quote
of $10,000 I know that's a ton of money
but I would normally quote someone
significantly more for this type of
table but again I wanted him to think
that he could come to me for all future
orders I don't want anybody to lose
track on what I'm actually doing here so
I P that epoxy I made sure to use fans
if you don't know epoxy gets hot and
when you pour a lot of epoxy like this
it gets really hot so if I wouldn't have
used fans this epoxy would have almost
certainly overheated cracked and you
would have had a really bad time and if
you didn't know that if you'd like some
more tips and tricks on building an
epoxy table whether it's building a
solid brick of epoxy like this or a more
traditional Live Edge and epoxy table I
have a virtual epoxy table workshop and
we go through absolutely every step to
building an epoxy table in your home
shop or garage why you need to use fans
the types of finish to get a crystal
clear finish versus kind of a more
opaque or natural finish that you might
want to use on wood it's over 3 hours of
content I still go through every week
and answer all the questions that people
ask me it is what I say not guaranteeing
yourself success but you can skip the
learning curve you basically skip the
first two years of building an epoxy
table so if you want some more
information on that there's a link in
the
description I know what you're thinking
the guy just wanted to add the ski table
to the order he never said anything
about canceling the Big Walnut table so
what's up with the Big Walnut table and
every six months or so we would stay in
touch I'd reach out ask how the
construction was going and I don't think
it was going very well I got the feeling
it was mostly permitting issues or
issues with the county or government
type issues where the house just wasn't
getting built to the best of my
understanding anyway and he never said
anything about asking for his money back
he never asked for a portion of it back
he was just a really great customer to
work with and after about 3 and half
years or so he just I think got fed up
with it and was like hey I'll just take
that ski table that we talked about but
this kind of put me into a tough spot
and I'll explain more in just a
second if you haven't gathered what I'm
going to do is I'm just going to bounce
back and forth from that story to the
actual construction of this table so
people that want to see how this table
is built can know how to do it
themselves and people who are more
interested in the story also get a
follow along with that so I'll stop
giving that caveat every time I switch
back and forth now but what I'm doing
here is I'm using a flush trim bit to
get a perfect fit against this metal
base and even though this base was
welded up really really accurately
there's always going to be some
variation either in my cut using a
tracksaw or a table saw or a little bit
of warping of the metal so what I'm
using is that flush trim bit there to
have it contoured exactly to the base
itself it's just a really slick way of
doing
things the big epoxy por went pretty
well there really weren't many bubbles
left in the epoxy itself but I made a
mistake in that I should have sealed the
ends of the skis with a faster drag
epoxy and I even thought about it and I
looked at the skis closely but they
looked to be fairly dense kind of
fiberglass in the middle but what
happened was there was actually air
trapped in those skis and at the very
end of the curing process those bubbles
came out and came up to the surface in a
few spots so to fix that I drilled them
out with the Dremel and I'm coming back
with clear epoxy you might think that
it'd be better to use like a blue tint
but it's almost impossible to get that
very very light blue tint match so clear
is going to be your best bet if you have
a similar problem or you're trying to
fill some bubbles or a slight void it's
almost always better to use Clear even
on a black
table so when the client told me or at
least implied that he no longer needs
the big walnut dining table and instead
will just take this smaller ski table I
was in a little bit of a tough spot
because this isn't a project I was
particularly passionate about and I
probably wouldn't have taken this order
if he'd reached out in 2024 and said he
just wanted this cast epoxy table
because when I choose a project I need
to be able to make a video on it I need
that video to be interesting and
honestly I I don't know how interesting
this video is going to be I guess we'll
know once it's uploaded but I wasn't
passionate about building this table but
also this was a great customer he had
not hassled me for over 3 years gave me
a deposit instantly and I wanted to
extend to him that same respect that he
gave to me and also I don't know if you
guys remember this early whatever mid
2020 when I first talked to this guy
things were a lot cheaper and so
inflation could be a factor or should be
a factor but the guy had already given
me $166,000 and so if I was to come to
him and be like hey coincidentally now
you don't want that big table and that
$10,000 table from 3 years ago that's
going to be
$15,700 I thought that would have been
kind of shady or even if I said it was
13 or 14,000 just whatever that normal
rate that I would have told someone in
2024 I feel like it would have sounded
like a bait and switch and I would have
probably been Furious if someone did
that to me so I decided to forego any of
the inflation related costs and just
tell him yeah I'll honor that $10,000
original cost because again that guy was
a great customer he was so easy to work
with the whole time and I wanted to
extend to him that same
courtesy I have built these solid epoxy
type tables before and I finished them a
number of different ways in the past one
of my favorite builds ever was I had
this solid brick of kind of a blue
gradient epoxy and I bent it out in the
sun I don't know if you guys saw that or
not but it was one of my favorite builds
and for that one I actually just
polished the epoxy itself I went from
like 80 grit to 3,000 grit and then
polished it with Auto Automotive
compounds the problem with epoxy is I
know people hear epoxy and you think
that it's the hardest Coating in the
world compared to something like this 2K
acrylic it's actually not that hard so
if you can you're better off coating it
with some type of clear coat and to my
understanding these 2K acrylics are some
of the hardest Coatings you can give so
I only had to sand this up to about 400
grit and then I'm hitting it with this
2K acrylic and I'm still going to have
to go through the whole polishing
process but it's going to be a much more
durable surface in the end
I actually wasn't spraying the 2K
acrylic there I know I said I was but it
was technically the sanding sealer
that's designed to go under this 2K
acrylic but I don't actually fully
understand what a sanding sealer does
and I don't want to answer a bunch of
questions because I don't have any
answers to those questions so we'll just
pretend it was that acrylic top coat but
you can see there was a couple little
pinhole bubbles that were left from
those bubbles that I patched earlier and
some people might look at those and call
them a feature they may say yes kind of
like that cool bubbling Treasure Chest
that the scuba diver has in the
aquariums and I am not one of those I
don't like the look of the bubbles I
wish they weren't there I did tell this
customer there was a number of risks
with doing a big epoxy brick like this
and one of the risks I told them it
might crack and we might lose the skis
altoe and I told them I won't charge you
for the table if I ruin it but I also
can't get your skis back so don't send
me any Priceless heirlooms that you must
have or that you can't have ruined and I
just kind of explained the risk and that
it's not going to be perfect there's
probably going to be some little micro
Bubbles and he said that he was fine
with all all of that so just know I did
warn the customer and they weren't
terrible but again if I'm being honest I
wish they weren't
there if you didn't know it is nearly
impossible to get a perfect finish right
off of the spray gun and I am not
particularly gifted with the spray gun
so I was going to have a lot of wet
sanding to do but even a high-end
automotive shop when it comes out of
their paint booth when a car comes out
and it's got that clear coat on it they
still have to do this wet sanding and
polishing that's really what separates
the high-end show cars from the low-end
show cars or all the rest to the cars
there's always some degreee of orange
peel like you see me trying to sand out
there and you also might be noticing
some bad audio in the background and
that's cuz my guy Charlie was here and
sanding isn't that much fun to watch but
do you know what is fun to watch taking
trees down and this actually isn't
Charlie this is one of Charlie's guys
but it was a really kind of Blustery Day
and these are some old Lombardi popper
trees which turns out is the same thing
as mapa Burl which is kind of a really
pretty wood but they ended up taking
this one down
pretty satisfying right and this was all
two weeks before we had a massive storm
that took down about 15 trees four giant
trees that ended up taking down a bunch
of trees on their way down but it was a
fun process watching Charlie do that and
much better than watching me
sand wasn't watching trees come down way
more fun than watching me sand that up
to 3,000 grit but the polishing is
actually a little bit more satisfying
cuz it goes from that fairly opaque to
almost crystal clear and this is a
three-step polishing I think I'm only
showing you the first step here with the
wool mitt but I do go through all three
steps on this 3M system and I am not an
expert but I can generally make things
shine pretty well the underside though
Scott actually had a great idea for this
he suggested doing a frosted Underside
so you wouldn't see right through the
table it would almost look like it's
sitting on snow which is again something
Scott came up with and I pitched the
idea to the customer and he actually
really liked the idea so here's how I'm
going to go about achieving the Frosted
look on the
underside I've done this frosted effect
once years ago I had a customer say he
wanted this kind of frosted look on this
clear epoxy and Redwood table so I'd
played around a lot with it years ago
and I think I can do the same thing here
and what I did was I sanded up to 320
grit and then came back with that maroon
pad and tried to sand it as evenly as I
could and that was the tricky part just
trying to get it an even consistency but
I wanted to make it look really good for
the adhesive that's going to hold this
top down this is my most nerve-wracking
part of this build cuz all the rest
could be fixed later but now
everything's done and I don't even know
if I have enough of this
glue I have a spoiler for you in that
this does not work it does not go very
well at all and you might be wondering
why I didn't just weld tabs onto this
table like I normally do and have it
bolted down and that's a fair question
now knowing what I know but at the time
I didn't want to have any visible bolts
and I thought that it would look bad
being able to to see through that clear
epoxy and having the bolt also I hate
running threaded inserts right into
epoxy I'm always a little bit worried
that they're going to crack the epoxy
however if I had this over to do again
and actually I do do this over again I
would do it entirely different but I
this point I don't know that and felt
pretty good about myself well it's been
about 4 days since I put that adhesive
down and I thought the silicone would
dry to that kind of clear silicone
looking opaque look which would really
match the bottom of this table and it
did not at all it looks terrible there's
just kind of wavy lines um and I don't
like it and I don't want it going out of
my shop that way so the only alternative
is actually to add some tabs to the
metal which means grinding off the
powder coat
rewelding bolting it
down but I think it's going to look a
little better and I just I really don't
want this in someone else's house
looking like this I was just getting
ready to video trying to pry this off I
didn't know how tough this construction
adhesive would be and it just popped off
which probably means it wasn't a very
good uh substance to use but I guess
it's good for this anyway but get the
rest of yeah that was not going to work
anyway oh well I guess I'm glad it
looked
bad so in order to make this look right
I need to carefully go through with this
chisel plane try to fillet all of that
clear construction adhesive off without
gouging the epoxy itself because I'm
going to have to go back do that same
kind of sanded frosted effect which
shouldn't be too difficult as long as I
don't gouge it with this chisel plane
and it came off pretty well this wasn't
too bad of a process the metal on the
other hand this was a real problem or at
least it wasn't a huge problem because
this is the guy that built the base this
is Alias and he claims that's his real
name however I can't tell you how many
times a girl gave me that name at the
bar and turned out to actually not be
her name but he came to my shop and
actually welded the tabs on and to avoid
seeing the bolts we were able to place
the table on there and find out where
exactly each ski was so we could place a
mount right under the ski which I think
was a pretty good solution and it was so
nice to have alas come to my shop
directly to do this because it is very
difficult getting across town especially
trying to line up all those holes just
perfectly so big thanks to Alas I
convinced him to start an Instagram page
which I will link in the description CU
he did not even have any social media
channels whatsoever but he's trying to
get his business going so give him a
follow check out his work big thanks to
Alias I mentioned earlier that I really
don't like drilling into epoxy and
especially adding threaded inserts
directly into epoxy is one of the last
things I want to do but I don't really
have a choice here so what I'm doing is
I'm very carefully trying to not drill
through ski and not trying to crack it
but I'm using an oversized drill bit and
what this is going to do is this is
going to enable me to add a little bit
of epoxy to the threaded insert and
therefore the holding power will lie
with that epoxy not the threads like it
would in a wood table and as I'm
watching Scott edit this I was like why
did I add blue to that epoxy and he goes
oh he said at the time you thought that
would blend in a little better and I
have no recollection of saying that or
even thinking it but apparently I did
and it didn't look bad but I don't think
it made any difference and the final
step before assembly is adding N3 Nano
and if you watch any of my videos you
know that I always add N3 Nano to my
pieces this is a product that I offer
myself this isn't something that anybody
pays me to to add this is a product that
I offer and one of the things I'm most
proud of is going to provide so much
protection from spills stained and a
clear table like this scratches it's
also a repair surface so even if you do
scratch it you could add another coat of
the N3 Nano makes a massive
difference with all the delays about
having to modify the table base and
having it rep powder coated I was sure I
was going to be late on delivery but
when I told him it was ready to be sent
out he said great I won't be at that
house in Colorado for 6 weeks and go
ahead and hold off until then I was like
oh guess I'm early but he did offer to
have me send it to his place in North
Dakota and then he would ship it from
there to Colorado I thought that seemed
like a lot of extra shipping so I held
on to it in my shop for those 6 weeks
and looked a little awkward in the
background of a few videos you might
have seen but all in all a build that I
am not super excited to replicate but I
am really happy with how it turned out
and he told me he was thrilled with how
it looked as well I mentioned at the
start of the video that this customer
would only know a lot of the behind the
scenes details of this build if they
actually watch this video so if you are
that customer and you know who you are
and you feel like leaving a comment say
whatever you want and probably send me
an email letting me know that you left a
comment I will pin that as the very top
comment so if you're curious if this
customer actually saw the video check
the comments and we'll see you guys
always want to know what these pieces
look like in the customer's house so I
sent them an email and asked for a photo
in the space and he sent me this so
thank you so much remember he's a better
customer than he is photographer
5.0 / 5 (0 votes)