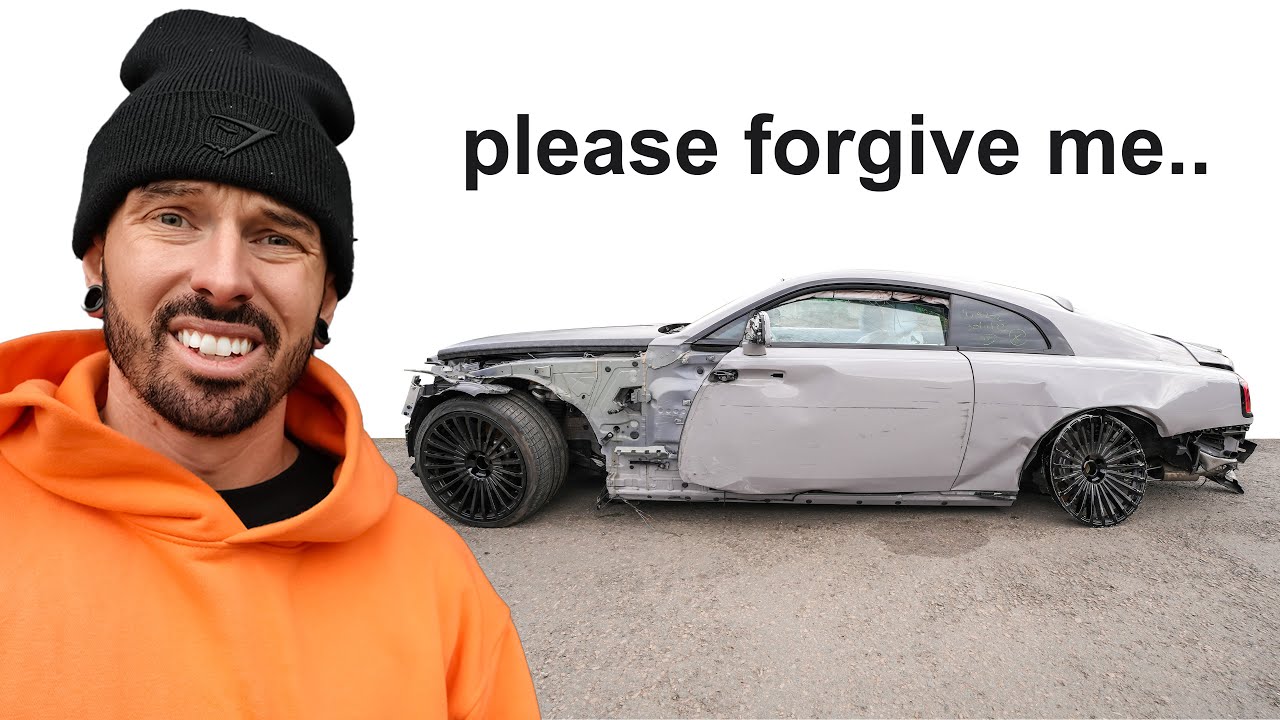
DRIVING MARCUS RASHFORDS WRECKED ROLLS ROYCE FOR THE FIRST TIME
Summary
TLDRIn this video, the presenter embarks on a challenging project of restoring Marcus Rashford's old Rolls-Royce, which was involved in an accident. The process involves a meticulous evaluation of the vehicle's condition, strategizing on the best approach to repair it, and sourcing replacement parts from a second-hand Rolls-Royce, referred to as 'Sue'. The video documents the labor-intensive process of stripping down, assessing, and replacing various components, including subframes, suspension parts, engine mounts, and even the fuel tank. Throughout the video, the presenter shares insights into the unique features and complexities of working on a luxury vehicle like the Rolls-Royce, highlighting the high costs of repairs and the resourcefulness needed to navigate the challenges. The video concludes with the successful installation of the new parts and the first drive of the restored Rolls-Royce, despite the remaining issues with the brakes and airbags, marking a significant milestone in the restoration journey.
Takeaways
- 🚗 Marcus Rashford's old Rolls-Royce is being repaired using parts from a second-hand Rolls-Royce as original parts are extremely expensive.
- 💰 The cost of a single part, like a subframe, can reach up to $9599, highlighting the high expenses associated with maintaining luxury vehicles.
- 🔧 The decision to use an older model Rolls-Royce for parts was made to save costs and extend the life of the damaged vehicle.
- 🔩 The front and rear subframes, as well as many parts, were removed from the damaged Rolls-Royce for repair and replacement.
- 🔄 Parts from the second-hand Rolls-Royce, named Sue, are being used to replace damaged components from Rashford's car.
- 🚫 The car's air suspension system is a complex and costly part of the vehicle, which is being addressed with parts from Sue.
- 💡 The team discovered that despite the age difference, parts from Sue's older model look and fit similarly to Rashford's newer model.
- 🚨 The engine mount and subframe of the Rolls-Royce were found to be broken, likely due to the accident, and needed replacement.
- 🔧 The brake system, including the brake discs and calipers, was a focus of the repair process, with attention to ensuring proper function and safety.
- 🚀 The car was successfully moved and driven for the first time since the accident, despite the numerous ongoing repairs and replacements.
Q & A
What is the main purpose of the video?
-The main purpose of the video is to document the process of repairing Marcus Rashford's old Rolls-Royce by using parts from another older model Rolls-Royce as a donor car.
Why was the decision made to purchase an older model Rolls-Royce?
-The decision to purchase an older model Rolls-Royce was made because the cost of Mansory parts for the car was found to be extremely expensive, and using it for parts would be a more cost-effective solution.
What specific parts from Sue's Rolls-Royce were used to replace damaged parts on Rashford's car?
-Specific parts from Sue's Rolls-Royce that were used include the subframes, suspension, engine mount, and some components from the rear end of the car.
What challenges did the team face while working on the Rolls-Royce?
-The team faced challenges such as the high cost of parts, the complexity of removing and replacing certain components, and dealing with damage that was not initially visible but discovered during the repair process.
How did the team ensure that the parts from the donor car were compatible with Rashford's Rolls-Royce?
-The team ensured compatibility by carefully examining and comparing the parts from both cars, noting that while there were some differences, many parts were the same or could be adapted for use.
What was the condition of the Rolls-Royce after the repair process was completed?
-After the repair process, the Rolls-Royce was in a drivable condition despite some remaining issues such as the brake system not being fully functional and the rear end of the car being higher than usual due to unplugged suspension components.
What was the significance of the car vertical check in the repair process?
-The car vertical check was significant as it provided the team with important information about the car's history, including any past damage, which helped guide their repair decisions.
How did the team address the issue of the brake fluid not being fully bled?
-The team initially attempted to bleed the brakes using a conventional method with a brake bleeder tool, but when this was unsuccessful, they considered using the car's diagnostic tool and eventually decided to top up the brake fluid and see if the car's movement would help clear the system.
What other issues remained unresolved by the end of the video?
-By the end of the video, unresolved issues included the brake system not being fully functional, the airbags needing replacement, and the damage to the rear quarter of the car that required further attention.
What was the final outcome of the first drive after the repairs?
-The final outcome of the first drive was that the car was able to move, but it was not in optimal condition due to issues with the brakes, suspension, and other components that needed further repair.
Outlines
🚗 Restoring Marcus Rashford's Old Rolls-Royce
The video begins with the host discussing the restoration of Marcus Rashford's vintage Rolls-Royce. They mention the expensive nature of Mansuri parts, with a staggering $9,599 cost for just one part, leading to the decision of purchasing an older model for parts. The host shares their strategy of swapping parts between the two vehicles to save costs and preserve the car's warranty, highlighting the importance of using only aluminum parts to avoid potential warranty issues. The process includes cleaning and identifying which parts are reusable and which need replacement, focusing on the front and rear subframes as a starting point.
🛠️ Uncovering Damage and Replacing Parts
In this segment, the host continues the restoration process by uncovering more damage on the Rolls-Royce. They discuss the need for additional parts due to the discovered damage, such as the lower crash bars and the engine mount. The host also shares an insight into the differences between the older and newer models of Rolls-Royce, noting changes in brake discs and other components. The segment emphasizes the importance of using compatible parts and the challenges of sourcing them, including the discovery of a broken radiator and the need to replace various suspension components.
🔧 Complexities of Rear Subframe and Fuel Tank Replacement
This paragraph details the intricate process of replacing the rear subframe and fuel tank of the Rolls-Royce. The host describes the labor-intensive task of removing the rear parcel shelf and seats to access the subframe bolts. They also discuss the challenges of replacing the fuel tank, highlighting the need for a new one due to significant damage. The segment underscores the complexity of working on luxury vehicles and the importance of having a donor car for instant access to replacement parts, which saves both time and money.
💡 Resolving Damage and Reassembling the Car
The host continues the reassembly process, focusing on the rear subframe and differential. They discuss the strategy of using the original, lightly used components from the donor car to replace the damaged parts of the Rolls-Royce. The segment also covers the replacement of the brake discs and the intricacies of refilling the differential with the correct amount of oil. The host emphasizes the importance of proper fluid levels and the special procedure for bleeding the brakes, which is crucial for the car's safe operation.
🚙 First Drive After Accident
In this exciting segment, the host takes the Rolls-Royce for its first drive since the accident. Despite the car's incomplete restoration, with missing airbags and brake issues, they manage to move the vehicle. The host discusses the car's handling, noting the high rear end due to unplugged rear suspension and the challenges of driving without brakes. They also mention the need to replace the passenger door, wing mirror, and glass, highlighting the extensive work still required to complete the restoration project.
🎉 Reflecting on Progress and Future Steps
The host concludes the video by reflecting on the progress made in restoring Marcus Rashford's old Rolls-Royce. Despite the numerous challenges and the extensive work still ahead, they celebrate the achievement of getting the car to move. The host outlines the remaining tasks, including resolving the brake issue, completing the airbag system, and repairing the rear quarter damage. They express optimism about the future of the project, acknowledging the support and interest of their audience.
Mindmap
Keywords
💡Rolls-Royce
💡Auction
💡Subframe
💡Suspension
💡Engine Mount
💡Brake Discs
💡Rear Subframe
💡Cooling System
💡ABS Pump
💡Vacuum Filler
💡Power Steering Fluid
Highlights
Marcus Rashford's old Rolls-Royce is being repaired after an accident.
The cost of replacement parts for a Rolls-Royce is discussed, highlighting the expensive nature of Mansuri parts.
The decision to buy an older model Rolls-Royce for parts is explained.
The process of stripping down the Rolls-Royce and assessing which parts are usable is detailed.
The front and rear subframes are removed from the car.
The strategy of using parts from the older model to repair the newer one is discussed to save costs.
The similarities between the parts of the older and newer Rolls-Royce models are noted.
The importance of using new parts for the Rolls-Royce due to its warranty is emphasized.
The process of cleaning and preparing the subframes for reassembly is described.
The suspension system of the Rolls-Royce is discussed, noting the need for replacement due to wear.
The discovery of additional damage on the subframe during reassembly is mentioned.
The process of replacing the engine mount and other critical components is detailed.
The handling of the hydraulic lines and the anti-roll bar installation is discussed.
The car's first drive after the accident is described, highlighting the challenges faced.
The need for further repairs, particularly to the brake system and airbags, is noted.
The process of replacing the fuel tank from the donor car is outlined.
The rear subframe and differential are installed and the car's readiness for further testing is confirmed.
The car is driven for the first time since the accident, despite the lack of brakes and other issues.
The importance of the car's vertical check is emphasized for uncovering hidden issues.
Transcripts
here's Marcus rashford's old Rolls-Royce
rap and today we're going to drive it
for the first time since the
accident since buying this Rolls-Royce
at auction we've learned how expensive
mansuri parts are 1,300 what for that
and how expensive Rolls-Royce parts are
$
95991 for just that so expensive I
decided it was better buying an older
model
Rolls-Royce and using it for part parts
to fix this one I just hope I've made
the right decision because we've already
started stripping it
apart and now Sue
Sue looks like this you're looking very
sorry for herself but I still think I
still feel okay about this cuz I think
we're doing the right thing we've got
the front subframe off the rear subframe
off you probably would have seen us do
that in the second Channel now we' got
to work out what parts are good of
rashford's old Rolls-Royce and what
parts are good of Sue and then we're
going to
switch and swap the two because this has
done 50,000 miles and rashford's one's
only done a th000 so we want to save as
much as we can off that let's get these
cleaned
up now the good news is the parts of
this Rolls-Royce do look the same as
rashford's one even though it is an
older model it looks like the only thing
they've changed on the facelift is the
headlights and the front bumper in the
minute but we also want to avoid using
the older Parts as much as possible all
the stuff that we're going to be
replacing on this onto the rashford car
only because the rasher car isn't
categorized still under warranty so if
anything goes wrong on this still under
warranty not that we would ever do that
Rolls-Royce not that we would ever do
that but uh if anything does go wrong we
could potentially take it back now that
would be pretty cheeky and we just got
to hope that they don't watch the videos
but it's unlikely that we need to take
any of this back under warranty because
most of the parts we're using are just
aluminium Parts nothing really
electronical but now both of the
subframes are all cleaned up and we can
go and work out what we're going to keep
and what we're going to
replace one thing that we are going to
be changing off this side is the
suspension normally on a regular car
you'd have a a spring and a damper but
on this rolls because it is so flaming
heavy but also you're meant to feel like
you're on a boat and it's meant to be
really cushioning and soft and that's
why they have air suspension I think
this is going to be perished so from
rollsroyce is going to be extortionate
SU is going to be sacrificed for that
one that is a bit of kitten in it I
think it's
bent think it might be a bit bent Daren
bent we then got to work with' taking
off the stuff we didn't want on the Sue
Rolls-Royce like the steering rack and
the right side suspension to make a bare
front subframe ready to go on the
mansori rolls Roy another thing that we
found broken in the last video was the
engine mount so the engine mount
normally sits up here and this is
literally the only thing that the engine
is mounted to on the subframe and look
at this this is all broken cast
aluminium we don't actually know whether
this is done by the accident or this is
just actually happened but another thing
it's oil filled and it's is leaking oil
out everywhere so that's another thing
that we're going to change cuz that is
fully broken and do I trust the other
side absolutely not is the engine mount
bracket that's broke I've unbolted it
here with the four bolts holding it on
and I'm going to replace the engine
mount bracket along with the oil filled
engine mount of the old rolls to put on
the mansuri one and being that the
driver's side Castell minion broke I'm
also going to replacing the passenger
side one as well now moving back to the
sub frame we're replacing all of the
hydraulic lines making sure we maximize
all of those parts which have only done
1,000 miles okay we should now be able
to lower the car down down and marry the
subframe up with the car and uh get the
bolts in then we can concentrate on
getting all the rest bolted up let's do
it down comes the rollsroyce onto the
secondhand subframe we've got to line
the subframe up with the bolt holes but
before we do there's a few electrical
connectors to connect up first then we
can start putting the bolts in once
we've got two bolts in we can start to
lift the rolls Roy up staying up
is in ish is Ish we've made
progress the good thing about that is
because the subframe which is straight
has now gone onto the rashford car we
can tell that the frame is nice and
straight because the subframe bolts up
to it if it was all bent the subframe
wouldn't have bolted up to it so one
Savor da it's the back we're a little
bit worried about so far so good the
last two bolts for the subframe to
connect it to the front that goes but
after we put this bolt in we found more
damage that all
bent oh this could be bent you know look
this bit yeah yeah that's really bent
that's bent that's not lining up and
then also look this is bent here if you
stand back a bit stand back a bit Matt
that's
bent so this is why we got another car
because all of this would have just
added up it would have just been a
Fortune but it's good job now we can
just go to soup and get all this it
looks like this lower crash bars Bend
and the bar which connects that to the
subframe so we're going to need to
replace that but before we do I'm going
to put in the three bolts each side
which hold the engine mounts to the
subframe and once I put them in I can
start to put in the anti- roll bar this
is the biggest anti- roll bar I've ever
seen and it has hydraulic fluid going
for it I assume just to stiffen the
suspension up because it is so heavy
I've now mounted the anti- roll bar to
the to the subframe I've just got to
connect up all the hydraulic lines to
the anti-roll bar and then to this point
underneath the car where all of them
meet after that I've got to make sure I
put the bolt in which connects the
steering rack to the steering column
time to lower the car back down and I
can now take off this engine support bar
because the engine's just being
supported by the subframe now with that
off I'm over on to the left hand side of
the car putting on the heat shield
connecting in electrical connections not
forgetting all the plastic guards as
well we need to make this car look as
new as it actually is is I've got the
second hand suspension Str of Sue
cleaned it up and put that into place
and then the wheel hub connects up to
the top off after that on goes the brake
disc and then the brake
caliper making sure I remember to
connect all the electrical connections
and of course the brake line but then I
found something a little bit
different I've accidentally put on the
disc from Sue onto this and you can see
the brake pad isn't quite all the way on
the disc and you can see the heat shield
is sitting higher than the disc so we
think the disc is different then when we
had a look at the actual mansuri disc
which is well it's actually a BMW disc
you can see there the lip here is a lot
shorter than the lip on here so we're
hoping that by just changing the disc
it's fine and the wheel hubs not
different but I'm going to switch the
discs over and hopefully that will work
so did Rolls-Royce change the discs on
the new facelift model guess we're about
to find out yeah look at that for a
measurement look that's way bigger so
they've upgraded the disc
but that's actually longer in it so they
have upgraded the discs but now I'm
worried that the wheel hub is going to
be different as well so I'm putting on
the original disc onto the secondhand
wheel hub now yeah that's better so
we've learned one thing they upgraded
the brake discs on the black badge or
the newer model either one of the two so
if you're got a Rolls-Royce at home at
least you know that so it's good news
the wheel hub seems the same and the
only thing they seem to have changed is
a brake disc now we can connect up the
bolts at the top of the strut and we've
got a few more things we need to replace
this lower part here which is bent this
lower front crash bar which is also bent
the horn as well which is pretty much
dead and also there's supposed to be a
lower radiator there as well alongside
that these coolant lines are supposed to
lead to a coolant bottle which sits
behind the wing here so we're back over
on Sue to strip her apart even
more we've got to work away at getting
the front end completely stripped apart
so we can access the radiators and all
the parts we need look at
that yay carish Su is a fake BL black
badge because this on a black badge all
of this is black and this is Chrome and
look someone's painted it and someone's
painted it so they're a big fat
phony hey and she disappears underneath
cap goes up just so everyone know I bet
everyone wanted to know
that to we're making progress and a lot
of this stuff which is being removed
from Sue is still worth a fair bit of
money big
moment which is good news for us off
comes the grill which is now give us
access to the rest of the
bumper you got
it I didn't think I'd take a bu off like
that there we go Sue bumper what's the
good news this isn't bent and it looks
the same and there's a radiator there is
it looks the same yeah it looks the same
you're all right and then what about
this though what do you think that looks
flat if you ask me does it look the same
though cuz it's a different headlight
definitely looks the same other than the
fact it's straight so what you're saying
is
rollsroyce facelifted the cars and
charged their customers 60 70% more than
the previous G model for the sake of two
headlights and a bumper is that what
you're saying Matt you said that not me
and some discs oh and some breake discs
as well don't you know what I'm doing
Matthew I know but tell the viewers tell
the viewers I am taking this radiator
out of
su I'm getting it in the Box it's come
off the
post here we go front lower radiator is
off now we're removing the headlock
light so we can get to the bracket
behind it that we need to replace on the
mansori one it seems even though Sue
does have different headlights and a
different front bumper everything
underneath seems to be the same as the
facelift
one she doesn't want to
go I've got the front lower crash bar
off and my dad's working away at getting
the coolant bottle out and once he's
done that we're back onto the manor one
and we can now take off the broken parts
and switch them over for the good
ones now I'm actually going to find out
whether all of these parts are the same
because if they're not I'm in some
pretty big trouble first thing I'm
changing is that lower crash
[Music]
bar that is all in and it was the same
the only thing that's different is this
radar sensor which they don't have on
the older model but the funny thing is
this is off the older model and they've
still got the hole to put in for the
bolt so it's almost like they knew they
we're going to put that in well done
there's one win the second win will be
the horn and that is exactly the same of
course then we're moving on to this
bracket here which holds the headlight
in place and also the wing and it's
looking good it looks exactly the same
and fits in the same way now onto this
lower radiator which is part of the
charge cooling system I believe this
radiator actually bolts to the headlight
bracket and sure enough it all fits up
good next up the hoses here which run to
the coolant bottle behind the wing of
broken so my dad's got to remove them
from the mansori one and go get them
from
Sue this is the first time I've ever
seen a coolant bottle which sits behind
a wing but maybe they just ran out of
space in the engine base that big twin
turbo V12 certainly takes up a lot of
room now bad's put the secondhand hoses
in and the secondhand coolant bottle
he's realized that where the coolant
hose runs to the filler pipe the bit on
the pipe is actually broken so he's
going and got the one off Sue and now
he's got to replace this as well you can
see at the bottom of it here it's just
all snapped
off this is why we got Sue was a bit
quick on that one was we'd have had to
wait to order this yes we would have got
to this part here thought we could build
it up yeah and then try to order that
have to wait another 5 days for delivery
and all that stuff and then put that on
and found some else yeah so everyone's
saying why have you brought a donut car
so we can bring videos faster and so we
can say sue sue that's right another
benefit of having a donor car if we find
parts which are broken it doesn't cost
us any more money and we can get them
instantly that should be everything on
the front which should allow us to run
the car apart from all the fluids but
the back has got nothing on
still and one thing that we need to put
on is a fuel tank if you remember in the
last video we noticed the fuel tanker
took a Bea in it had a huge dent in it a
hole and a lot of the brackets holding
it were bent so this is another thing we
need to change hi I'm going to start by
removing the fider lines on Sue's fuel
tank and then me and my dad can slowly
lift it down got it 1 two
three down who put that much fuel in
there is it you
yeah now Matt I'm going to ask you a
question this you tank unit here with
the pump in yeah has done 50,000 yeah
that's getting deleted we need to take
put it in that one that one yeah yeah
swap it oh do you change it to that ring
locks in to those so what tools would
rollsroyce use hammer and
screwdriver oh look it worked there you
go oh my God look at those wir that
looks like it's a level sensor and
everything yeah but normally it's all
connected to that
all in favor of voting to keeping the
old fuel pump
in yeah we definitely changed it it's
brand brand new this one th000 miles
th000 miles it's just got a bit dirty
going from over there to here let's get
it in that fuel pump looked like it was
going to break from the moment we set
our eyes on it so we decided not to
change it but I think it' be pretty rare
if a fuel pump were to fail especially
the one in the tank but hey who knows
I'm plugging it all in in now and then
we can raise the fuel tank up and start
to do the tank strap bolts up which hold
the tank to the chassis of the car then
I can go in and connect up the filler
hoses and make sure all the clamps are
tied and that is 1 second hand fuel tank
in so just like the front the back Str
is also broken bent perished uh so we're
going to replace it off this one and put
the Sue one
on I'm not sure that's actually how you
properly do it there's got to be a
better procedure for that now the only
thing holding this Str to the car are
the top three bolts and we thought
they'd just be inside the boot but they
weren't
oh
no I haven't even looked and just based
on your reaction I know what's going to
happen do you know how you get them top
BS interior out yeah
inside here we go the worst thing is I
can't even take out the front seats to
do this because we can't open the doors
cuz because car's on the ramp well I've
got a plan Matt we going to have to do
this as a team I'm going to have to
start trying to get this out you're
going to have to pass me the tools cuz
I'm not getting in and out with the
tools so so I'm a tall
[Laughter]
lady you're joking how do you get them
[Music]
out so it looks like to get to the nuts
which hold the shock absorber in we've
got to remove the rear parcel shelf and
to remove the rear parcel shelf it looks
like we've got to remove the rear seats
but when you go in the boot there is
literally no nuts and bolts holding the
rear seats in so surely everything must
be done from inside the car T3 says 30
this is what he needs I found one T30
which was holding the bottom part of the
seat in but then I think the whole rear
bench was a complete unit oh secret door
oh secret that's it it's these two bolts
and these two and I think we might be
out now whilst we're trying to figure it
out on the mansori one my dad's trying
to figure it out on sue you don't have
to take this out you don't no oh okay
you have to take all the back seats out
parcel shelf
off what so should we shot this yeah it
seems they figured out the exact same
thing that we figured out another Secret
Door everything has to be done from
inside how are we going to get this out
the rear bench was complete and the only
way for us to get it out now is Through
the Windows it's lucky that the
Rolls-Royce has pillarless Windows
smashed it next stage is uh I think
these will just hand twist off this is
all for one suspension Str you imagine
the hours labor rolls also charges to
change this suspension stru I feel like
this is going to be blocking it well
it's got to take the headliner out as
well now it seems that the B pillar trim
is blocking the rear parcel shelf coming
out there's another thing we got to
remove fny guy
oh W okay all this for a Str I can't
believe it and back over it Su there's
progress oh yeah that's it and now I
figured out that I've got to remove the
rear door card to get this parcel shelf
off because that's also blocking it in
this is an insane amount of work just to
get to three bolts holding the strut on
hey can you see him no oh what are you
celebrating
for
now even though I've got the rear parcel
shelf off I still can't access the nuts
they're all under this sound deadening
back to the tool chest ladies and
gentlemen I'm on it one bang it they're
right here all along finally I got to
them
yeah Str out look at that and back over
at Sue it seems they were
struggling you having a good day Tony
great
day what's the hold up over here hey c
yeah there we go needs a be a to clean
up and she can go
on what a job that was just for three
bolts which could have been the other
way up why didn't they just make this
bigger and then have the bolts facing
downwards why why why why they obviously
don't want to uh people working on the
cars do they now we have the brand new
second hand suspension stru now my dad's
going to guide into place on the mansori
rolls and I'm going to put the nuts on
the top and speaking of brand new
secondhand that's a nice t-shirt you can
get for yourself with a link in the
description with that strut in we can
turn our attention to the rear subframe
we're going to try and use the original
differential because it's only done
1,000 miles and anything original of the
mansuri car because it's almost brand
new so me and my dad taking off the
differential of the second hand subframe
and taking the brake discs off along
with all the handbrake mechanism as well
and replacing it with the mansori one
it's a good job we took this one apart
because look it's also cast aluminium
which is broke again what's that bro oh
my God what this ain't even the side
that was on the accident do you reckon
old rashy boys been doing some hbre
turns in the rolling yeah do you know to
impress the girls right that's been
moved that's been trying to move with a
handbrake on another good reason of why
we have a donut car more expected damage
to the mansuri one but now we have the
subframe all ready to go back onto the
car and we've tried to make it as light
as possible to make this job as easy as
we can so we're going to lower the car
down try to get then try and get the
subframe bolts through the subframe and
bolted to the chassis then add all the
rest of the suspension to the subframe
once the car's in the air and so far our
plan seems to be
working optional
extra you've upgraded it upgrade first
upgrade done good news subframe is lined
up with the original mountains so we
know that we've got a straight subframe
and a straight car because they both
join together bad news for me though is
that when you check this car out on car
vertical it still shows the photos of it
damaged even though it's a fully clean
check with no outstanding Finance no
Marley's fraud and no records of being
damaged we explained why that was in the
last video
now I'll explain further but we've still
got the rest of the components to put on
this subframe so let's do that and I'll
explain further next up is that huge
anti- roll bar with the hydraulic lines
which go to it we put the anti-roll bar
on the subframe and now I'm connecting
up the lines again we've used the roll
bar of the original car next up is the
differential again of the original car
we've got it on a gearbox stand and
we're going to push it into place and
then tighten up all the bolts on the
subframe which
kind of went to plan oh do you know what
I just thought but it's not going to be
to lift in
without take your boat back out because
I put in the diff first I was unable to
put the prop shaft in afterwards so I've
got to loosen the diff back off to get
the prop shaft in then next up I can
start putting in all the rest of the
suspension components again of the
original car on the right hand side
because it wasn't damaged it's just a
technique now as you guys know I'm
always using car vertical to check cars
out mainly because it can uncover so
many hidden secrets about the car that a
seller might not want to tell you
remember uh we said R's been doing some
hand bre turns yeah and it snapped that
off I thought that was bolted to it took
the bolts out guess what the bit that's
broke off it not B to it no got to use
Su up then we you got to replace the
whole Hub can't believe it this this uh
whoever does the casting this cast iron
thing is not very good is it yeah
whoever does the cast aluminium on this
that's two broken bits that have failed
on this rolls the engine mount cast
broke and this handbrake cast broke so
it looks like we're going to have to
change the whole Hub just because of
this break here it's making me more and
more thankful for Sue which also has a
clean car vertical check and you can
check your car out using car vertical
and get get 20% off the check with the
link in the description box below and
using the code appearing on the screen
right now thank me later when you find
out some hidden history about your car
um carry on with uh this right the whole
rear subframe is in now we didn't expect
to use a lot of this side so um hence
why it's dirty so I think we're probably
going to get all that ice blasted and
cleaned up so it looks nice and clean
like the other side but we are a little
bit
doubtful of this rear diff now because
after we've like kind of spun the wheels
it it don't feel very smooth and we're
wondering whether when the drive shaft's
been ripped out of it whether it's
damaged it or not we know there's no oil
in it left so we've got to fill the oil
up now and there's a special way to do
that and I think that's what I'm going
to do now then we've got more fluids to
put in before we can drive
this did that did that loose break oh it
went it went it
went okay if I'm right but I am guessing
because I don't have any Rolls-Royce
manual you literally just fill it until
it starts coming out and we're going to
need a syringe for it oh gear oil stinks
SM
that o rough is it right got the diff
oil then we just inject it
in that's one in what to do it doctor in
there oh I think that's coming out now
oh yeah that's definitely coming out
that's coming out now didn't take
much can't have leaked it all
out how much they would charge you at
rolls Wars to do a diff
service that's like a three grand
service
that boom with the oil topped up in the
diff it's time to pay attention to more
fluid the C needs I've got a feeling
this is similar to the BMW M5 where you
can't just B bleed the brakes break you
can't just bleed the brakes normal
because underneath here inside there
there's like some massive ABS pump thing
and like all the air seems to collect in
there so before we had to use the code
reader to bleed the brakes what I'm
going to try and do first is an a
regular way of doing it and then if that
doesn't work we'll try the code reader
way first step is to take the cap off
the brake reservoir and top the brake
fluid up of course with valine brake
flid flid being that Weir te Valene once
we put the dot four in it's on to the
next step easy bleed aka Mr push now Mr
push as I like to call it is going to
screw onto the brake reservoir and you
can see a pipe coming off that cap into
the Mr push bottle and then another pipe
coming off that which goes down and
connects to the valve on a tire and it's
going to use the air from that tire to
pressurize the brake system there we go
oh look it's already pushed a load of
fluid through so that's putting pressure
through there now I believe it goes back
left back right front left front right
we just got to crack the nipples off so
air is being pushed from the tire down
this line here into Mr push's bottle
which is full of dot four brake fluid
and then another line is coming off Mr
push and into the brake reservoir all
I've got to do now is go around the
brake calipers and crack the bleed
nipple off and Mr push should push all
the air out of the brake system you can
see see it working on the back right
then the back left then I go to the
front left and the front right making
sure I crack both bleed nipples on the
front calipers cuz there's two on each
it's really full so we going to test it
be nice to us this interior needs a
right
clean oh yeah hang on see if we can get
a hard
pedal yeah we're going to have to plug
it in
or we just do it we're going to have to
we'll plug it in and then we'll see I
think it's going to be the same as the
M5 where we have to plug it in and go
through some special procedure but could
be wrong but yeah like all all brake
fluid was coming out every corner we've
seen it but still air in the system and
I think the air is in the ABS box so the
next step was to plug in my diagnostic
tool and see if we can bleed the brakes
electronically I think
maintenance condition based service
condition based service but it looks
like my diagnostic tool doesn't have the
option to bleed the brakes
electronically unlike what it did when
we had the M5 I even tried scanning it
as a BMW to see if I could trick it to
thinking it was a BMW and then seeing if
it would bleed that way but it didn't
work so the only option now was just to
keep going through and doing a bleed
procedure myself over and over again
yeah it's just like but it just wouldn't
work
work it's like there's no brake pads in
it it seems there was no air in any of
the brake calipers anymore but I think
the air was getting trapped in this ABS
pump and I couldn't think of any other
way to try and get it out the only other
option was to try and start the car then
bleed the brakes with it on but for me
to be able to start it I need to add the
coolant in it so it don't overheat next
up
coolant again not a simple task of just
pouring it in we've got coolant
reservoir for the engine there which
actually goes down and goes into this
big tank on side and then also a coolant
tank for the charge cooler system on the
BMW M3 we only had to vacuum fill the
this side of the coolant the engine side
and we just poured it into that and that
actually works so I'm going to go with
that theory let's vacuum fill that with
coolant then we should be able to run it
then we'll try doing the brakes oh and
we've still got that to put in as well
which is power steering and I think the
power steering fluid uses the same fluid
for the anti-roll bars as well I've
never heard of it before but I think it
does so out comes the vacuum filler
we've used this endless amount of times
on the channel and if you don't know
what this does by now I would suggest
just subscribing to the channel because
we use this on a regular also if you
subscribe it will keep you up today on
this full build anyway the good news is
it looks like the whole calling system
is holding a vacuum which means we have
no leaks in it now we're taking our
Valene coolant making sure we get no air
in the line and we're going to connect
that up to the vacuum that's been pulled
from the cooling system and now it's
going to suck all the coolant into the
cooling system which will make sure we
won't get any air locks and with no air
locks it means the car won't overheat so
far it's looking good we're then going
to take the vacuum filler off and top
the rest of the coolant up and then
pouring the coolant to the charge
cooling side this cooling system is just
for cooling down the two turbos which
are on this car and I don't think this
needs to be vacuum filled then after
that we just need to add the hydraulic
fluid for the steering rack and the anti
roll bars right so we start it see if it
runs the temperature bleed the
brakes yeah if it runs the temperature
we'll bleed the brakes if we can bleed
the brakes we can put the wheels on and
we can roll it out and then start
attacking that door I think we've got a
bit of brake pressure yeah so enough to
start I think so so is it ignition on
just needed to top up a bit more of the
hydraulic fluid now that it's run around
the system and then we can check the
brakes again both sides cooling it's
good should we try and bleed the brakes
again okay it's really spongy though
isn't it like we've got no brake pedal
oh my that we got nothing I don't know
how much difference it would have made
bleeding the brakes with the car on but
quite clearly no difference at all ah
was is it not
working I might break the pedal there's
got to be a procedure with the auto it's
got to be have you noticed that
everything we've done has been really
anti-
DIY like it will stop it will stop but
it ain't going to stop like it'll be
enough to roll us
out so even though we haven't managed to
get the brakes bled properly I still
wanted to attempt to move and drive this
car being that now we've got the front
subframe the rear subframe and the
differential on and the new fuel tank it
should technically drive so I've gone
and got the wheels off Sue and then we
can lower the car down and try and move
it for the first time since the
[Music]
accident why the back that high the
thing is as well we haven't plugged in
any of the rear suspension so it has no
idea what it's doing with the ride High
time to roll it forward for the first
time since the
accident it's
working and so far so good it's driving
but the back end of the car is so
high is that going off it was a second
ago this side's gone off that front's g
up look at that oh yeah oh look it's
like leing
itself at the look it's doing a
Wheeling it's gone from literally like
that to like that I don't think you're
supposed to drive rolls royes without
that thing plugged in no I don't think
so I also think you're meant to have
airbags in you're also meant to have
brakes and also what's going to be an
issue if we drive this is just going to
sling open so uh all in favor of taking
it off all now we're going to need to
replace this whole passenger door anyway
along with the wing mirror and the glass
as well the only thing that's worth
keeping off this door is the door card
so before we take the door off I'm going
to remove the door card first making
sure not to break anything because I'm
pretty sure this mansori interior is
around £33,000
however outrageous it may be now that
I've got the door card unclipped I need
to remove all the electrical connections
from it and I can start removing the
door from the car now first step is to
disconnect the electronics from the
chassis of the car then there's the bolt
for the check strap and then one bolt
which holds the top hinge and one bolt
which holds the bottom hinge we just
about got the door
off
go and now she's ready for the first
drive it's
time for no breaks in a Rolls-Royce and
one door and a really dirty steering
wheel it's moving it feels massive this
is the first time you drove a ro yeah it
feels massive it's ridiculous isn't it
you don't know where the rest of the car
is it's out the unit no it's actually
made it out
yeah yes this was it I was actually
driving at rashford's Old rollsroyce for
the first time since the accident what a
car
I've got no breaks every warning light
on the dashboard is a joke they we
cruising in rashford's Old
rollsroyce
yeah now it does look a mess I'll agree
with you there but what an achievement
so far to actually get this thing moving
we're one step closer
now
nice it's
[Music]
good
so it's driving it's rolling the first
time I've ever driven a RS voice wave I
didn't imagine it to be like this but
hey you can't pick and choose can you at
all we need to solve the brake issue we
need to do all the airbags we need to do
the damage on the rear quarter there's
still a lot to
do look at all those
chickens
like a
drug I just can't deny giving me the
best time
5.0 / 5 (0 votes)
I DESTROYED A ROLLS ROYCE TO REBUILD MARCUS RASHFORDS WRAITH
I Bought A $350,000 Rolls Royce Wraith About To Be SCRAPPED (5000 Miles From Home)

Jay Leno's 2024 Rolls-Royce Spectre - Jay Leno's Garage
THE TRUTH ABOUT MARCUS RASHFORD'S WRECKED ROLLS ROYCE WRAITH

Most Reliable 200K Mile Car? Let's Settle This!
HUGE DELAY ON THE ROLLS ROYCE WRAITH REBUILD!