I Tested Bending Epoxy With the Sun
Summary
TLDRIn this video, the team tackles the challenge of repairing a broken table, turning it into a creative project. After a failed attempt to cut the table legs, they decide to use epoxy to mend and modify the table. The process involves destructively shaping the broken pieces, creating a mold, and pouring in clear epoxy. Despite numerous setbacks, including leaks and cracks, they persist, employing innovative solutions like using the sun to bend the epoxy. The table's final form is a testament to their resilience and creativity, showcasing a blend of imperfections and unique design elements.
Takeaways
- 😅 The team was working on a project that they considered one of the coolest things they've ever built, which unfortunately exploded during the process.
- 🛠️ After the explosion, they brainstormed with Sam, Joe, and Chris to come up with solutions to fix the broken table, deciding between two options: stitching it back together or using epoxy to bridge the gap.
- 🗳️ The decision was put to a vote with their audience, who overwhelmingly chose to pour epoxy as the method to fix the table.
- 🔨 They proceeded with a plan to break the table further to facilitate the epoxy repair, using various tools to create 'natural breaks' for a more aesthetic outcome.
- 🛡️ A mold was created to hold the epoxy and prevent leaks, with a focus on ensuring no bubbles formed in the crystal-clear epoxy.
- 🚫 Despite careful planning, the epoxy pour resulted in leaks and required on-the-spot problem-solving to manage the situation.
- 🔄 The team attempted to bend the epoxy-coated table using the heat of the sun, which proved to be a challenging and risky process.
- 🔨 After the bending attempt, they had to address cracks and imperfections by filling them with more epoxy and using a power planer to smooth the surface.
- 🔲 The final steps included sanding and polishing the table to achieve a clear and professional finish.
- 🎉 Despite numerous setbacks and challenges, the team ultimately completed the table, showcasing their resilience and creativity.
Q & A
What was the initial problem with the table that the team was working on?
-The table exploded off the table in a fit of rage and blew up on the floor, causing the team to feel heartbroken.
What were the two options presented to the viewers for fixing the broken table?
-The two options were to either stitch the table back together using various makeshift materials like bow ties and slats, or to use epoxy to bridge the gap where it broke.
What was the viewer's verdict on how to fix the table?
-The viewers voted to use epoxy to fix the table, which led to the team devising a plan to pour epoxy as a solution.
What was the unique approach the team considered to repair the table with epoxy?
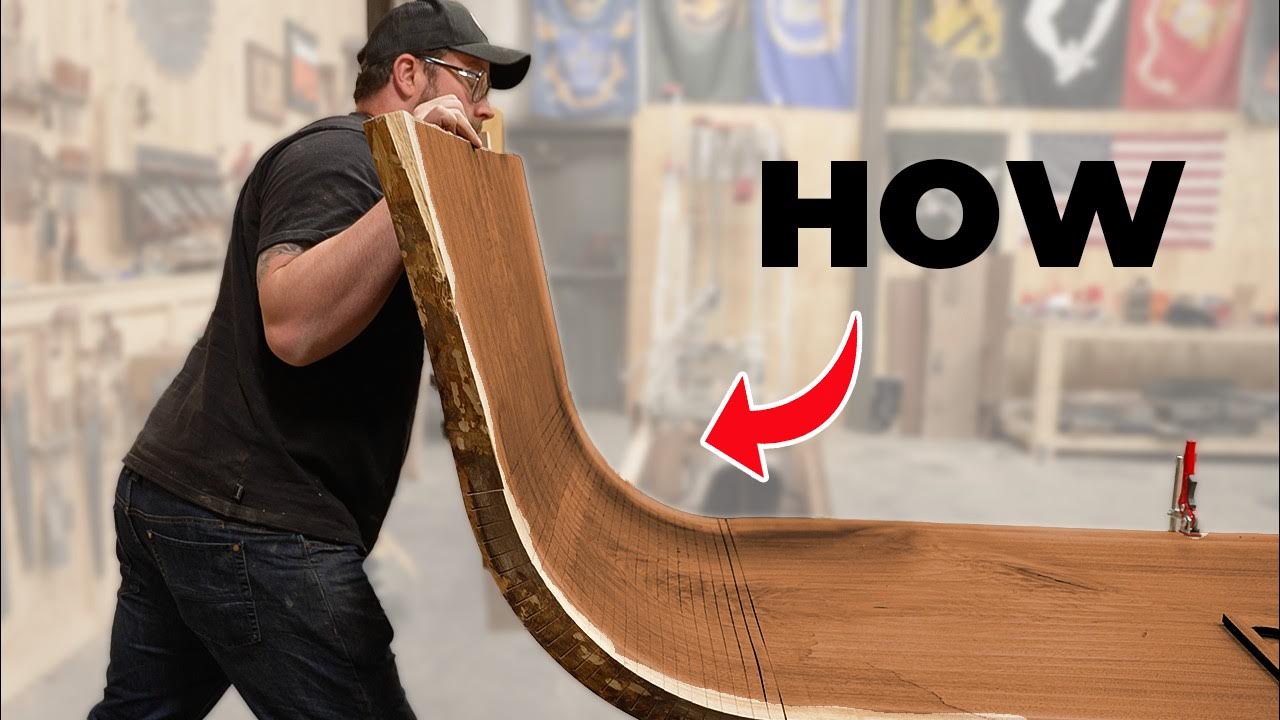
-The team planned to use flat parts together, pour the epoxy flat with a crystal clear river, and then try to bend it over a mold while it's still soft.
What tools did the team use to break the curve off the table?
-The team used hatchets, hammers, sledges, and other destructive tools to break the curve off the table and create natural breaks.
How did the team plan to prevent bubbles while pouring the epoxy?
-They planned to use thin layers of resin and cover all gaps and potential leak areas with caulk to prevent bubbles and ensure the epoxy holds together without leaking.
What issue did the team face during the epoxy pouring process?
-The team faced issues with leaks in the mold, which they had to quickly address by applying more caulk and using paper towels to slow down the leaks.
What was the team's strategy to bend the epoxy-coated table leg?
-They planned to place the table outside in the sun, hoping the heat would soften the epoxy enough to bend it over a mold.
What difficulties did the team encounter while trying to bend the epoxy?
-The epoxy did not bend as expected, and instead of following the mold, it cracked and snapped off the wood, causing visible damage.
How did the team address the cracks in the epoxy after the failed bending attempt?
-They decided to fill the cracks with more epoxy, including a gold-colored epoxy to add a decorative touch, and then clamped the table to hold the repair in place.
What was the final step in the process after addressing the cracks?
-The final step was to sand, polish, and apply a final finish to the table, including cutting the legs to the correct length and ensuring the table was stable.
Outlines
😀 Table Restoration Challenge
The video begins with the narrator expressing excitement about a recent project gone wrong. They recount a mishap where a table exploded off a table while cutting its legs, leaving the team disheartened. The narrator then discusses two options for fixing the table: either stitching it back together with makeshift materials or using epoxy to bridge the gap. The audience's input is sought on social media, and it's decided to proceed with the epoxy solution. The team devises a plan to repair the table, which includes breaking it further to facilitate the repair and using a mold to bend the table into shape. The process is fraught with uncertainty and potential for further disaster, adding an element of suspense to the project.
🛠️ Crafting a Resin Mold for Repair
The team embarks on a complex repair process for the damaged table. They plan to use flat parts and epoxy to reconstruct the table, aiming to pour it flat and then bend it over a mold while the epoxy is still soft. The narrator acknowledges the novelty and risk of this approach, as it has never been attempted before. Tools such as hatchets and hammers are gathered for the task, and they proceed to break the table in a controlled manner to create natural-looking breaks. The team then creates a mold and discusses strategies to prevent bubbles and ensure the epoxy holds the table together, reflecting their innovative problem-solving approach.
🚫 Encountering Issues with the Epoxy Pour
The team faces several challenges during the epoxy pouring process. Despite careful planning and execution, they encounter leaks in their mold, which they attempt to seal with hot glue and additional caulking. The video captures the tension and urgency as they work to contain the epoxy and prevent a complete failure. Despite the setbacks, they manage to stop the leaks temporarily and express cautious optimism about the outcome of their repair efforts.
🌞 Attempting to Bend the Epoxy-Infused Table
After successfully pouring the epoxy and allowing it to set, the team attempts to bend the table using the heat of the sun. They construct a bending form and carefully remove the table from its mold, hoping the heat will facilitate the bending process. However, they quickly realize that the bending is not going as planned, with cracks forming and the epoxy separating from the wood. The team scrambles to address these issues, reflecting the trial-and-error nature of their work.
🔨 Post-Bend Repairs and Finishing Touches
Following the bending attempt, the team is left with a table that has several cracks and imperfections. They decide to fill these with more epoxy, including a gold epoxy to add a decorative touch. The video shows the team's perseverance and creativity as they work to salvage their project. They also discuss the long drying time for the epoxy and the need to wait for the right moment to bend the table again. The team's commitment to making the table look cool despite the challenges is evident throughout this phase of the project.
🎨 Final Polish and Reflection on the Project
In the final stages of the project, the team focuses on sanding and polishing the table to achieve a clear and attractive finish. They discuss the decision to use a power plane to level the epoxy and the challenges of working with the material. The video captures the team's reflections on the project's difficulties and the lessons learned. Despite the numerous setbacks and the complexity of the task, they express pride in their work and gratitude for the viewers' support. The team wraps up the project with a sense of accomplishment and a hint at future projects to come.
Mindmap
Keywords
💡Epoxy
💡Resin
💡Mold
💡Live Edge
💡Degassing
💡Bending
💡Caulk
💡Sanding
💡Polishing
💡Stitches
💡Master Class
Highlights
Team worked on a unique project involving a table that exploded off the table in a fit of rage.
After the table blew up, the team felt heartbroken but came up with creative solutions to fix it.
Two options were presented to the audience: to stitch the table back together or use epoxy to bridge the gap.
The community voted, and the decision was made to pour epoxy as a fix.
The team planned to use flat parts and eliminate curves, then pour a crystal clear epoxy and bend it while soft.
A destructive process was initiated to prepare the table for the epoxy pour.
The team used hatchets and hammers to create natural breaks for the epoxy to follow.
A square cut was made to create a more natural break, which was then broken off with a jigsaw.
A mold was constructed to pour the epoxy, with a focus on preventing bubbles and ensuring a leak-proof setup.
The team used a unique technique with thin layers of resin to hold the table together.
The epoxy was poured, and despite concerns, the table did not leak significantly.
The team faced challenges with the epoxy sinking and cracks forming, requiring additional fixes.
An attempt to bend the epoxy using the sun's heat resulted in further complications.
The team decided to fill the cracks with gold epoxy, inspired by Japanese repair techniques.
Final steps included sanding, polishing, and sealing the table to complete the project.
The table, despite its challenges, turned out to be a unique piece with a combination of imperfections and clear epoxy.
The project tested the team's skills and patience, resulting in a learning experience and a one-of-a-kind table.
Transcripts
why are you smirking yes oh my god dude
last week we fed up and by we I mean me
we were working on what is arguably one
of the coolest things we've ever built
around here and when I jumped up on a
table to cut the legs down the length it
exploded off of the table in a fit of
rage and then blew up on the floor now I
was super sad and the rest of the team
we were all pretty heartbroken so I
talked to Sam and Joe and Chris and we
came up with some awesome ways that we
think we can fix it and I asked you guys
we gave you two options one was to
stitch this thing back together kind of
like Frankenstein and make it work with
bow ties and slats and who knows what
else or two to somehow use aoxy to
bridge the gap on where it broke that
leads us to where we are now and
thousands of you have commented on the
last video the verdicts in and we're
going to pour this sucker now we got to
come up with a game plan so the first
thing we need to do is grab the broken
pieces hopefully Sam's not crushed
underneath them too soon because yes
he's still here he didn't quit quite yet
he's still willing to put up with me
aren't you buddy I am but I don't know
if you're aware of this or not there's a
small crack in this end of the table we
may have to do something to repair it
we're we're going to repair it I think
it goes without saying guys Sam I
apologize if I made you feel any way
good it's okay appreciate it anytime men
okay now that all of our feelings have
subsided almost 2,000 votes at the time
of when we're counting this for pouring
it so we're going to go with the epoxy
fix the best way to do this there's
actually probably no best way to do this
so I think we actually need to do a
little bit more damage to this before we
can rebuild it what the plan is we're
going to use the flat Parts together and
kind of eliminate all the parts we
curved and pour it flat with a crystal
clear River and then try and bend it
over a mold while it's still soft none
of this has ever been attempted before
here so things could get even doubly
squirely after well what's already been
a ridiculous project so far so I think
we need to get a couple hatchets maybe
some hammers sledges anything of
destructive tools the best part is if
anything happens to that side we could
just pour that side bend it again yeah
yeah try not to break that side this
time do my best I mean it was 100% my
fault probably catch it with this
piece let's grab some hatchets and stuff
I'm going to let you have first whack I
don't think this going to do much all
right I guess we just got to break the
curve off gravity will probably help
protect your eyes before you break stuff
like
this all right that was great now I want
you to have this oh wow momento just
remember our times together nice we just
want to get some like what looks like
natural breaks on the end we can pretty
much go as far as we'd like but anything
that's gonna kind of look like this
crack wise I think will look good you
want to give her the old wacka rusi go
ahead let out your anger and
frustration you son of a
[Laughter]
thank God pouring that clean break
at least dude couldn't have gone better
oh we're idiots Legendary Super Clean we
could just glue that back together just
add more character to it this is going
great I wonder I mean now that it's
split in half how we could actually do
this to eff good wondering if we should
like cut some like reliefs into it and
then kind of come back and break it off
yeah I feel like that's the move so for
those of you that can't see under here
is a square cut and that doesn't look
natural obviously if you couldn't see
the square part that' be kind of what
we're going for jigsaw all right we'll
break this off put the big girl in there
I'm going to let you try all the fun
things first on here cuz I'm the devil
the devil I think we just kind of throw
relief marks into it
[Music]
okay yeah that's what we're going
for should try well it's broken so who
cares about keeping it together at this
point you know what I'm saying you know
what I'm saying
[Music]
I think that's the look we're going for
just enough Breaking and stuff so we're
going to have to seal this now we got to
figure out how to do that side there's
only one option we clamp it on
the floor going vertical I'll hold it so
for the big side I guess we're just
going to have to use the jigs saw to
give us some relief I kind of like the
way that I was able to use the band saw
to give us some depth here it looks kind
of like a pretty natural break I would I
would think there's a lot of splintering
there's some parts that I'm going to
need to come back and touch up a bit but
my thoughts are I'll just kind of cut
some stuff out and see how she
[Music]
goes Sam went ahead and build a little
mold here let's kind of just mock it up
and show you guys what we're thinking
before you get the cocking on so we
can't build a traditional mold just
because of the nature of having the open
end there so we're going to have to like
kind of make do with an open mold and
prey so this is the vision is that's how
much Gap we're going to have what we're
trying to do here is prevent bubbles cuz
we're pouring this thing crystal clear
sure about that I'm going to blow out
all these like gaps and
stuff and Sam and I are going to come in
and just based on a bunch of really thin
resin hopefully it holds this thing
together and keeps from bubbling this is
one of those techniques I developed
doing the Burly stuff for the master
class and if you want to get all my tips
and techniques you can download the
master class right now got a link in the
description with a special discount code
for you guys just for watching this
video you save 50 bucks it's got all my
tips my tricks everything I know about
making Live Edge and epoxy tables all of
it we just added glass table let's check
it out the next morning this is getting
school
early oh hey
Chris yeah you better run run away
everyone thinks I'm the mean one we're
going to cul these two down and then
clamp them to the table we're then going
to run a bead the whole way across on
the base on this side and drop it down
so it smooshy smooshies on it and kind
of hopefully creates some sort of a
barrier we're then going to clamp that
down to the table hoping to keep all of
the the resin inside from there we're
going to go ahead and use some gardening
Edge trim to make ourselves a dam on the
sides here the biggest point of issue or
concern is that that be a caul
underneath this is not how you want to
be able to form and this could go
terribly wrong and literally just have
all of the resin pour out basically
immediately I don't like it but I don't
see a better way to do it this stuff
just going everywhere it's like not
touching the whole I have a very
low hope that we don't just dump res
everywhere okay so I know I talked about
the garden stuff but I realized that
Blake has been using 8in melamine in his
molds so we're going to try this this is
just 8 in particle board that we covered
in TC tape my intention here is can we
get it to kind of create a flexed mold
around this Edge we'll put some spacers
and nail them into here and then caul
all of it in order to keep all of the
resin that we can inside and then just
be super super diligent on these edges
maybe even go underneath hit it with
another beat of caulk just all the caul
all the caulk I want it we've only got
one shot to make this thing like leak
proof which is where most of my concern
is right now we've got culk everywhere
top bottoms around surround Sam's
caulking beads underneath we're going to
throw a bead of caul on the top we
actually going to use the call as a
potential stop because we've got tbec on
there to pour up to C on o all around I
don't know a better way to do it and so
we're just going to wait for this to dry
and then we are going to send it Ron you
hate epoxy so I can't even ask Ron for
help here damn it guess I'll see you
guys tomorrow I'll see you tomorrow all
right we should be dry which means it's
time for the pour we're pouring crystal
clear so we've got brand new buckets
we've got a couple gallons we're going
to get our gallon calculation done here
of uh total Bo fathom we've got our
degassing ready to rock and roll I'm
going to use the epoxy calculator here
we're pretty much like 28 in by 35 by 2
which is River length what did I say 28
2 35 enter that says 8.5 gallons damn
that's a lot more there's no way I would
like you to Crunch those numbers again
just crunch them please crunch n gallons
for this I mean I guess it's like very
similar to like a
river all right we've got everything
degassed Sam and Chris mixed everything
up it's been sitting chilling we're
looking crystal clear here I cannot
emphasize enough how terrified I am to
pour this this is not a traditional mold
and everything could go terribly wrong
at this point I'm probably the most
puckered I've been in a long long time
we're going to send it with bucket one
check for leaks and then go with bucket
two and three Sam would you mind putting
on the Hazmat suit preparing for
surgical procedures in case of a leak
absolutely where do we uh where do we
keep that at you're wearing it excellent
glove up let's roll you know what I just
realized this is the same thing I wore
when the slab cracked I intentionally
wore it today to fix it I or you know
you want to bring those Good Vibes yeah
exactly
yeah let the glove up and pour this
okay all right check for leaks
check for
leaks trying to avoid any more bubbles I
want to pour it on the wood though
because of the uh pulled crap off of
it cuz our Corner that one damn it yeah
right there right next to you
John so this is uh my nightmare but also
how we've stopped leaks for years that
was exactly where we were concerned so
the paper towel will slow it down and
then the tiac will like stick it on Sam
green and I developed this years ago
started hit the fan on us on a
couple
[Music]
projects it's pretty small but we'll
lose all nine gallons through
[Music]
it nice bucket got a leak over here
where this meets the inside it's like
pouring out of there got the you
me
oh yeah it's over the table now it's on
the table it's fine it's fine hot gluc
line here to Dam it up we didn't caul
this side we should be fine now we get
to obsess over the table and any leaks
we caught one over there in the corner
this is not for the faint of heart we
stopped leaking under here for now I
think nope we got another one over here
um so we're just going to yeah this
sucks Sam's using the rest of the resin
to fill that we're going to keep popping
bubbles now we just have to time it
perfectly to where it's hard but not
completely hard so we can bend it over
the mold to get us that bent leg things
are about to get squirely real squirely
so we all got alarm set we're going to
just keep popping in here over the next
you know 100 hours making sure nothing
breaks and uh and fingers cross
everything stays good one week later
she's dry baby look at this you hear
that rock hard we were going to try to
time it to do the bend when it was like
still soft but we really didn't know
when would be an appropriate time cuz we
were all concerned about the release
from the sides and the base so we kind
of just skipped that part it is a sunny
day so I'm stoked because we're going to
put this thing outside and go 100% a
completely unique idea to us is to bend
this in the sun I've never seen this
before nobody's I'm kidding cam
pioneered the way doing weird with
the sun and epoxy we're going to give
that a shot I think that's the best way
to do it so the next steps is we're
going to roll it over there the guys are
going to give me a hand we're going to
crack it out of this this is a very
unique Contraption we've got two tables
and it clamped down we've got to be
careful that we don't break it again
going to take our utmost care to get it
over there we'll take it outside in the
sun hopefully we can get a Bend Sam
Sam we got to be ready for that next
time come on Sam catch it yeah Qui
breaks the internet thinks you're weak
come on Sam we'll be ready all our
training has prepared us for this moment
Sam are you ready I'm
[Music]
ready samam Sam what were you doing
working can you give me a hand dude
unbelievable dude we we got no leaks
well minor leaks from the top here this
was the only thing that actually leaked
which we just solved pretty quickly so
I'm I'm stoked it's looking freaking
sick The Hope here is that we can get
the bend to start like right here and uh
we won't need to do much flattening
except for just kind of sanding this
down so let's pop her out baby let's go
here we go here we go here we go
[Applause]
clean baby clean Min is that it's not
clean we did not do that right cuz we
put release on this whole thing right
yeah oh no we CK these down we C them
yeah that's why they're sticking so hard
I wonder if we should flip it and peel
that off instead of trying to peel this
up I mentioned flipping it and then Sam
brought it to my attention that we
caulked it to the table just all the
caulk all the
caulk I'm really concerned about gouging
and like breaking the resin in here we
got it flipped over and Det hated from
the table base because we CA this down
and then mold release and probably
should have put tyvec down on that piece
of melamine here we're going to roll it
over to the CNC hang the curly edge off
of it and flatten this on there stopping
right before we get to the Walnut and
the epoxy this is pretty risky we could
really have some stuff up
here Chris brought it down as far as
we're comfortable with we got a little
bit of resin coming through which means
we get to take the rest off by hand
fortunately it's a lot less material
we're going Rotex and whatever other
I can come up with to get it
off I did not anticipate this part as I
never
do all right guys so John asked me to go
ahead and make a bending form so we can
bend this epoxy when it's out in the
heat so going ahead see and seed out the
slap Parts cut down some stretches to go
between them nail it together ready to
go I have to carve The Edge to match
these edges before we put this thing out
into the sun before we can try and
bending it it's so hot out humid that
like I can bend it on my own so
hopefully this works look at this I have
layers this is insane and I've already
had look at all it on the floor I've
never had this happen I wonder if it's
cuz it's it's really humid in here I
believe but looking cool check so I got
like a nice matching external profile
here I'll bring the sander in touch it
up slightly get the other side and we'll
be good to go it's bending time you
rolling this is it now we
wait already going holy holy
it's so heavy it's already going I see
it move yeah wow now we just got to hope
it follows the mold that is crazy I can
push on it it's visibly going down like
I can feel it going down I feel like I I
could break it at any moment and I've
already broke it once I should probably
not touch
[Music]
it what's going on oh just doing the
same thing on all these Corners here
here here here oh it's like cooled at
the touch and this shit's like hot up
and feel this down here I wonder you
think we should get out here with some
heat guns ate it be too much it's only
been 10 minutes I think I'm just like so
impatient cuz it's bending so much like
oh this thing should be done any minute
is it pushes down breaking more and more
oh man this one's like gash Stitch it
it's going to bend
versus don't you put that on us so it's
just snapping off the wood you can like
put your finger in it is soft like you
see how I can get a thumb print in there
go back together damn I thought we would
get more more heat down here but it's
like all the Heat's focused right here
that's cuz all the weight is right yeah
I don't know what the we're going to
what are we doing what are we going to
do what what are we doing this is
turning to be the the Damned hardest
thing we've ever done looking at it in
hindsight I'm like obviously the wood's
not going to bend the wood's going to
stay straight we should have bent it
further away from the wood and poured it
longer and cut the bottom off yeah that
was stupid damn hopefully we can figure
something out to make that look decent
it just look looks like now it was
going so good the shittiest part about
working with resin and doing stuff like
this is it's so long to get another
chance to fix this is another like week
of dry
time I think that's the best we can do
we should have done that from the first
go cuz it's supporting it right where
it's cracking if it does crack what if
we did throw a couple stitches in there
like everybody gets their way everybody
with me at the end of the day I don't
care what we do as long as it looks cool
we could come back and fill that with
like a gold epoxy Japanese technique
with gold
well sweet that was going awful now it's
kind of a little bit better than awful I
think I have an idea on how to pretty it
up with the part we've already broken so
because we're idiots Glutton and fans of
all things hard we're going to try to
fill these cracks overnight here with
some resin so Chris just loosen actually
I'm going to I'm just going to crack
mine slide this down like a quar to a/
inch don't bring in my face oh what
happened just so bad right now to save
this AB ation I'm going to because we're
just completely tearing all of the resin
off at where the cracks are we have the
pivot point of the bend I'm sure you
guys will comment was too close to the
wood and so because of that you can see
that this wants to rip off down here
because of where the bend started the
intention for the bend was to be in this
area we have that up because we don't
know what the hell we're doing nor do I
think anyone know what they're doing
when they do crap like this we're going
to clamp it all back up and we're going
to fill it with more epoxy to try and uh
save us from absolutely ruining the
table so I'm just going to mix up some
gold resin here we're going to go with
this Roman gold pigment why not we don't
want it to be under gold I don't if
we're going with that I don't know what
that technique's called bunch of guys
have viral videos on it we're trying all
the techniques in this video after this
video I'm making a picnic table on a 2x4
a little longer than a few minutes later
she's dry I think so we're going to pop
it out of clamps see if this thing
explodes apart I guess pop the ratchet
this could be it don't hurt yourself
you're at sweetheart all okay no extreme
popping last
clamp everything is making me
nervous can we
get well we didn't get any spring back
which is great now we just got to make
it not look like dog I'm thinking
once I can clean it up it'll definitely
look better I'm really looking forward
to the next like 12 hours of sanding so
I basically I'm going to clean up the
resin and all the stuff that's going on
here and kind of make an assessment on
next steps once I get it down to like
kind of how it's going to look just
going to put it on good old
workbench getting my ass kicked and Sam
had the brilliant idea because he's not
a little that if we use a power
plane we can get through the epoxy he's
actually done this on a few of other
projects I actually don't ever think to
use that tool he's going to give me a
hand here no pressure it's brand new so
they want sharp blades on there so we're
dealing with a multitude of issues as
this entire project seems to be first
and foremost we've got to get this
sanded and Polished and at this angle
it's quite a pain in the ass secondly
our resin here sunk and uh we went with
like that gold to try and make it look
like it's got that like Japanese
technique where they fix stuff I think
it's Japanese our final decision is we
are going to end up stitching it as well
so all you that voted for stitching
you're going to get your stitches well
well well we're going to cut a uh
template on the the CNC and should make
this fairly quick for us to drop these
stitches in get them then all flushed
down but in the meantime I've got to put
a couple hours into sanding and
polishing this we also have to fill all
of these so we cut a bunch of wedges
that match the grain Direction and green
color on here so we got to get all of
those glued
in that's it appreciate the help guys
and that is another 3,000 pairs of shop
Shades ready to go for you guys cannot
believe how many of you have purchased a
pair and supported us in our journey
here with our new product these will go
fast so grab yourself a pair before
they're gone cuz that first 3,000 like
that we got a bunch of these sticks so
what we're going to do here is more or
less layer this thing together in a cool
way that makes it look like it got some
some stitches done on it the idea is
random um so we've got two 3 and 4 in
long pieces I got a little template made
here it's going to put me kind of to the
test but I think to strengthen these
gaps up I'll just kind of cut that
pocket as best I can and I think this
will look pretty cool getting The Best
of Both Worlds wasn't intending on doing
this so those of you that voted for
stitches you're getting stitches I can't
just fill it with epoxy well I could but
we don't have time for it to dry because
we are in a time crunch it's Tuesday and
this sucker's coming out for you guys on
Sunday so that's a whole day for epoxy
to dry so we're going to go and and try
to make this
work now I just got to do the the resin
okay okay we're going to use some
5minute epoxy to put these in because we
have to go with epoxy on epoxy now we
can't use glue to bond to epoxy that
would be a no no we don't feel like
waiting till tomorrow for everything to
dry this should suffice these are pretty
tight Sam cut these all pretty good this
in case anyone was curious my vote from
the get-go was stitches but I'm an idiot
as everyone knows
[Music]
this is looking awesome little random
stitch for you that one went
considerably better than when I did the
table versus Jordan so now we get into
the fun stuff sanding and wet sanding so
I'm going to get this uh this is this
part's already done to 220 we're going
to get it all the way up to 320 dry go
through all the Grits wet and we got to
do the bottom too so yay more
sanding it's funny cuz you're like you
just want Perfection and it has no
chance you like this whole piece is all
about making imperfection
beautiful it sets didn't explode it's
not rocking at all we still got to cut
the feet the length though but we're not
going to do anything different this time
we're literally going to try the exact
same thing all right let's flip it
over you guys tell me you think there's
a better
[Music]
[Applause]
way no no no
no all right so about 30 35 minutes ago
everything was fine John went in his uh
office do his craft a career and uh this
happened we went from having a nice 90°
and the Heat's starting to bring it down
so ratchet straps to bring it back in
but I got faith she'll be back in 90
very far from 9 right long ways so bad
this is so bad I'm going to start
polishing this Joe's going to put the
camera down polish this we could have
this table flip back over and very very
little all right why are you smirking
yes is oh my god dude are you kidding oh
my God how is that possible crystal
clear though
it's long it's clear yeah damn it
do you think it's cuz it's 90° in here
be hey dude look at that thing I just
got in the zone here he came out like 20
minutes later he's like Dam and I look
over and it's like this has turned out
to be one of the mosted up days in my
life so in the final stages this thing
could be a catastrophic failure if this
doesn't work we're hoping just like
gravity flattened it out while Sam was
working on it that we can do the same
thing with gravity going the other
direction we're going to put some weight
on this end and let it sit overnight
it's like 90° in here right now I don't
know about you guys but I don't have a
better idea we thought we'd be done with
this thing today this is going great you
know another couple weeks wasted on
something that could just literally not
work and it was looking awesome so I
guess we'll see you tomorrow see if this
works so she survived the night we um
hung a bunch of Weights off of it we had
to put on a different table CH got weird
we got a couple more cracks showed up
like these got worse to be honest like
the concept ccept of the broken pieces
and clear I dig it it's awesome the
bending aspect with that is where all of
our problems in line but we're in the
home stretch we need to cut the legs to
length and just a final touch up sand
and finish everything went to when
we cut the legs to length last time so
this could get interesting somehow the
table's over 8 ft
now it's way higher over here oh boy oh
the fireball table's 5x 10 we could put
it on there and do this new to boy it's
almost 10 ft what's crazy is there's no
rock we just need to cut it straight now
a little bit of a slant so we only need
to cut one side technically cuz this is
the one we cut before and then it was we
were going to try to cut again and then
it fell on the other side and died what
we going to use it for I can't believe
this thing got to 10 ft remember when I
said we should try say when I talking
about this try just doing a little
coffee table and our team meeting turned
into like no we got to send it and we're
like let's send it now we're a month
into sending it all right let's stand
her up
a here we go
[Music]
again let's
go final part
here ready Bud think we could just slip
it upside down and cut it yeah you're
probably right hey John why didn't you
do this the first time I don't like
running the saw at the side because of
gravity and then this piece of the wood
as I'm cutting it pinches the blade
itself inside of it so there's just more
potential for things to to go terribly
wrong so being able to use gravity your
advantage but not trying to drop slabs
on people this time here we
[Music]
go looks way better way better I
honestly kind of like how it's beveled
on the bottom too gives like a shadow
line on the floor gosh that thing pisses
me off still looks like it's going this
[Music]
way all right finally looks like we've
got a standing table what are we doing
with this thing besides throwing it away
that's all that's left is a final
sanding and polishing yeah we got to
polish this side up I'm for the part
that always surprises me for some reason
I don't like doing this but I do like
the reward I don't know weird we're
polishing it with our 3M polishing kit
what do you think Joe I said it might be
one of the more clear pores that we've
done I mean it seems pretty pretty nice
yeah we're going to have to work a
little bit to get the epoxy out of these
like voids that are in there but it is
nice and clear cool cuz the little
imperfections work with this look from
scratch so Sam has asked for the honor
to spray this and also came up with a
pretty good game plan we're going to
Bunk it up so we can spray the bottom
and the top at the same time he'll
pretty much just be wrapping around it
we're hitting it with a two part
catalyzed lacquer should bring this
thing home and buff it up after that's
done let us spray
[Music]
she's sitting a little low I know this
leg bent out again after we got out of
finish I don't know what's going on but
we're calling it a wrap on this thing
you'll probably never see it again and
nor will we this was a tough one every
about this project was hard really put
us to the test was absolutely ridiculous
all of you that sent it over to test I
appreciate it and thank you for pushing
me to be better appreciate all of you
guys that tune in every single week to
watch let me know what are we going to
build next
5.0 / 5 (0 votes)